블로그 이미지
윤영식
Full Stacker, Application Architecter, KnowHow Dispenser and Bike Rider

Publication

Category

Recent Post

2021. 8. 5. 09:28 Angular/Concept

Angular router의 loadChildren 을 사용하지 않고 Lazy loading하는 방법을 알아본다. 


Angular Module 에 대한 Lazy Loading

Angular의 Lazy Loading 방식

  • NgModule 단위로 lazy loading한다.
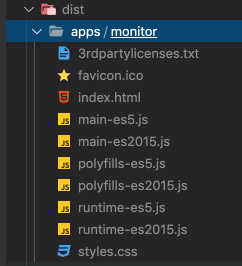
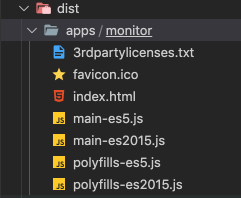
  • Angular v8부터 import(<module path>).then(mod => mod.<moduleName>) 방식으로 로딩한다. import 구문을 사용하면 자동으로 code splitting이 된다.
  • Angular v7버전 이하는 ViewEngine 이라는 Template엔진을 사용했고, 8부터 선택적으로 9부터는 디폴트로 Ivy를 Template엔진으로 사용한다.
  • Module을 컴파일/로딩하고 Component를 인스턴스화하기위해 ComponentFactoryResolver를 사용하고, ViewContainer에 인스턴스화된 컴포넌트를 렌더링한다.

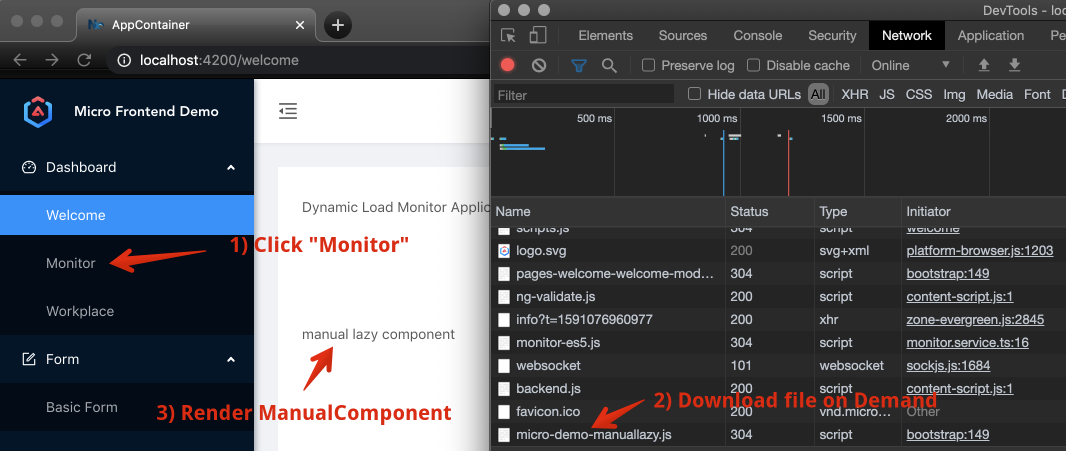
우선 manual lazy loading을 위한 모듈과 컴포넌트를 생성한다. 

// 라이브러리 생성, nx 또는 ng 둘 다 사용가능하다
$ nx g lib manuallazy

// 컴포넌트 생성
$ nx g c manual --project=manuallazy
CREATE libs/manuallazy/src/lib/manual/manual.component.scss (0 bytes)
CREATE libs/manuallazy/src/lib/manual/manual.component.html (21 bytes)
CREATE libs/manuallazy/src/lib/manual/manual.component.spec.ts (628 bytes)
CREATE libs/manuallazy/src/lib/manual/manual.component.ts (283 bytes)
UPDATE libs/manuallazy/src/lib/manuallazy.module.ts (266 bytes)

lazyload하는 service를 "app-container" 애플리케이션에 생성한다.

$ nx g s lazy-loader --project=app-container
CREATE apps/app-container/src/app/lazy-loader.service.spec.ts (378 bytes)
CREATE apps/app-container/src/app/lazy-loader.service.ts (139 bytes)

서비스에 loadModule 메소드를 추가한다. 8전부터 Ivy 사용만 대응한다. 7버전 이하는 NgModuleFactoryLoader를 사용한다. (참조)

import { Compiler, Injectable, Injector, NgModuleFactory, Type } from '@angular/core';

@Injectable({
    providedIn: 'root',
})
export class LazyLoaderService {
    constructor(private compiler: Compiler, private injector: Injector) {}

    loadModule(path: any) {
        (path() as Promise<Type<any>>)
            .then((elementModule) => {
                    try {
                        return this.compiler.compileModuleAsync(elementModule);
                    } catch (err) {
                        throw err;
                    }
            })
            .then((moduleFactory) => {
                try {
                    const elementModuleRef = moduleFactory.create(this.injector);
                    const moduleInstance = elementModuleRef.instance;

                    // instantiate component dynamically.
                } catch (err) {
                    throw err;
                }
            });
    }
}


컴포넌트 인스턴스화 및 ViewContainer에 렌더링하기

다음 순서로 컴포넌트를 인스턴스화 한다. 

  • ManuallazyComponent를 manuallazy 라이브러리에 생성한다.
  • MauallazyModule에 초기 인스턴스화할 Component를 리턴한다.
  • LazyLoaderService에서 ComponentFactoryResolver를 통해 인스턴스화하고 ViewContainer에 할당한다. 
  • "app-container" 애플리케이션의 tsconfig.app.json에 "include"에 MauallazyModule의 index.ts를 추가 설정한다. 
  • "app-container" 애플리케이션에서 LazyLoaderService를 loadModule을 호출한다. 

ManulComponent를 생성한다. 

$ ng g c manual --project=manuallazy

// libs/manuallazy/lib/src/manual/manual.component.html
<p>manual lazy component</p>


ManuallazyModule에 ComponentType을 리턴한다.

// libs/manuallazy/src/lib/manuallazy.module.ts

import { NgModule } from '@angular/core';
import { CommonModule } from '@angular/common';
import { ManualComponent } from './manual/manual.component';

@NgModule({
    imports: [CommonModule],
    declarations: [ManualComponent],
})
export class ManuallazyModule {
    bootstrapComponent(): any {
        return ManualComponent;
    }
}


LazyLoaderService에 컴포넌트를 로딩하는 "addComponent" 메소드을 추가한다. 

// apps/app-container/src/app/lazy-loader.service.ts
import {
    Compiler,
    Injectable,
    Injector,
    NgModuleFactory,
    Type,
    ViewContainerRef,
    ComponentRef,
    ComponentFactory,
    ComponentFactoryResolver,
} from '@angular/core';

@Injectable({
    providedIn: 'root',
})
export class LazyLoaderService {
    constructor(private compiler: Compiler, private injector: Injector, private resolver: ComponentFactoryResolver) {}

    loadModule(path: any, viewContainer: ViewContainerRef): void {
        (path() as Promise<Type<any>>)
            .then((elementModule) => {
                try {
                    return this.compiler.compileModuleAsync(elementModule);
                } catch (err) {
                    throw err;
                }
            })
            .then((moduleFactory) => {
                try {
                    const elementModuleRef = moduleFactory.create(this.injector);
                    const moduleInstance = elementModuleRef.instance;

                    // instantiate component dynamically.
                    this.addComponent(moduleInstance.bootstrapComponent(), viewContainer);
                } catch (err) {
                    throw err;
                }
            });
    }

    addComponent(cmpType: any, viewContainer: ViewContainerRef): ComponentRef<any> {
        const factory: ComponentFactory<any> = this.resolver.resolveComponentFactory(cmpType);
        let cmp: ComponentRef<any>;
        if (viewContainer) {
            viewContainer.clear();
            cmp = viewContainer.createComponent(factory);
        }
        return cmp;
    }
}


"app-container" 애플리케이션의 tsconfig.app.json 에 MauallazyModule의 index.ts 를 추가 설정한다.

// apps/app-container/src/tsconfig.app.json 
{
    "extends": "./tsconfig.json",
    "compilerOptions": {
        "outDir": "../../dist/out-tsc",
        "types": []
    },
    "include": ["**/*.ts", "../../libs/lazyview/src/index.ts", "../../libs/manuallazy/src/index.ts"],
    "exclude": ["src/test-setup.ts", "**/*.spec.ts", "src/environments/*.ts"]
}


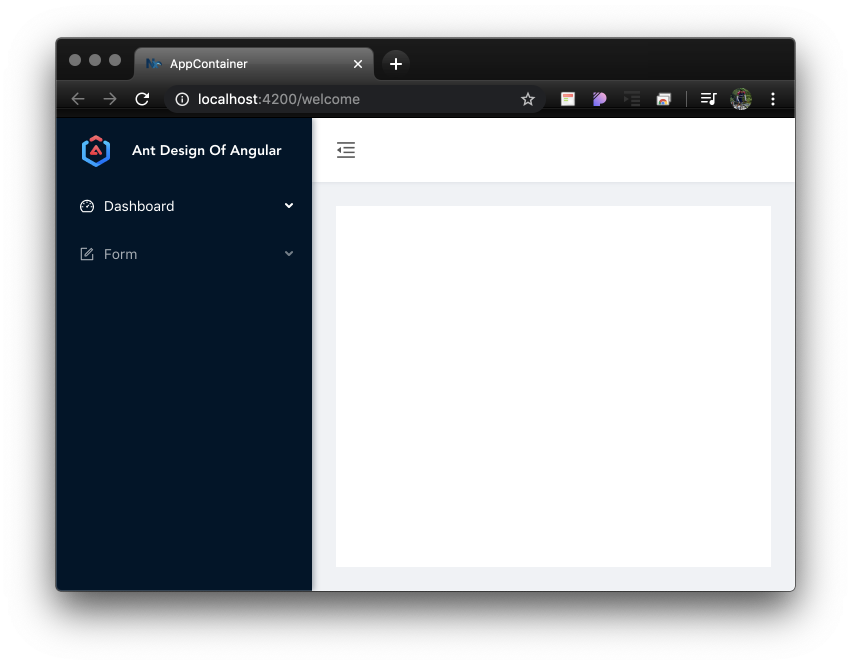
"app-container" 애플리케이션에서 ManullazyModule을 호출한다. 

// apps/app-container/src/app/app.component.html 일부분
<li nz-menu-item nzMatchRouter>
  <a (click)="manualLazyLoading($event)">Monitor</a>
</li>
... 중략 ...
<div class="inner-content">
   <router-outlet></router-outlet>
   <div style="padding-top: 100px;" #InnerContent></div>
</div>


// apps/app-container/src/app/app.component.ts
import { LazyLoaderService } from './lazy-loader.service';
import { Component, ViewChild, ViewContainerRef } from '@angular/core';

@Component({
    selector: 'app-root',
    templateUrl: './app.component.html',
    styleUrls: ['./app.component.scss'],
})
export class AppComponent {
    isCollapsed = false;
    @ViewChild('InnerContent', { read: ViewContainerRef }) innerContent: ViewContainerRef;

    constructor(private readonly lazyLoaderServie: LazyLoaderService) {}

    manualLazyLoading(event: MouseEvent): void {
        // import 할 때 위치투명하게 nx library를 호출한다.
        const manualLoad = () => import('@micro-demo/manuallazy').then((m) => m.ManuallazyModule);
        this.lazyLoaderServie.loadModule(manualLoad, this.innerContent);
    }
}

"Monitor" 메뉴를 클릭하면 "micro-demo-mauallazy.js"파일이 다운로드되고 ViewContainer위치에 컴퍼넌트를 렌더링한다

구현 소스: https://github.com/ysyun/blog-5730-micro-demo


ysyun/blog-5730-micro-demo

https://mobicon.tistory.com/573 블로그 소스. Contribute to ysyun/blog-5730-micro-demo development by creating an account on GitHub.

github.com


라우팅으로 통한 Angular 모듈 Lazy loading과 메뉴얼 Lazy loading 방식의 단점

  • 둘다 tsconfig.app.json과 같은 사전 설정작업이 필요하다.
  • "app-container"라는 Lazy loading된 모듈을 사용하는 애플리케이션과 함께 컴파일이 되어야 한다.

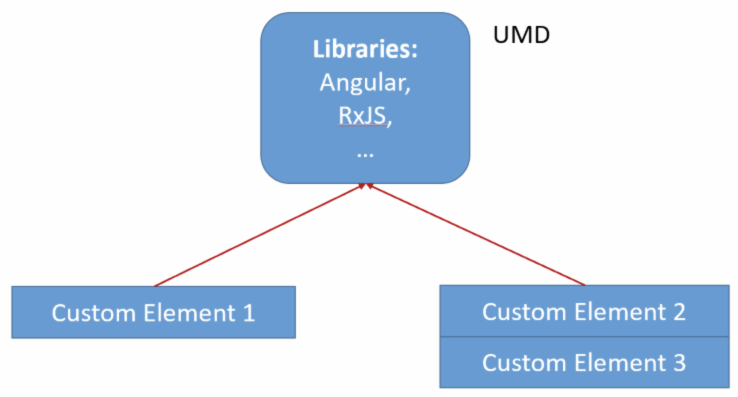
장점은 import구문을 통해 자동 Code Splitting 기능이다. 위이 단점을 해결하기 위해서 Web Components를 지원하는 @angular/elements를 사용한다. 이에 대한 글은 다음을 참조한다. 

https://mobicon.tistory.com/573


[Micro Frontend] Web Components 기반 마이크로 프론앤드

Angular v6부터 Web Components에 대한 지원으로 @angular/elements 기능이 추가되어 Custom HTML Tag을 만들 수 있도록 지원한다. 본 글은 해당 사이트의 글을 Nx.dev 환경과 통합하여 개발하는 과정을 설명한다...

mobicon.tistory.com


참조

https://juristr.com/blog/2019/10/lazyload-module-ivy-viewengine/


Manually Lazy Load an Angular Module with ViewEngine and Ivy

Find out how to lazy load an NgModule compatible with ViewEngine and Ivy

juristr.com

https://juristr.com/blog/2017/07/ng2-dynamic-tab-component/


Create a dynamic tab component with Angular

Learn about advanced topics such as dynamic components, ComponentFactoryResolver, ViewContainerRef, ngTemplateOutlet and much more...

juristr.com

https://juristr.com/blog/2019/04/state-lazy-loading-components-angular/#manual-lazy-loading-of-modules


Lazy load Angular Components

Or better..how to lazy load Angular Modules. Learn about the state of lazy loading and lazy loading on steroids with Angular Elements

juristr.com


posted by 윤영식
2020. 5. 18. 20:23 React/Architecture

Angular v6부터 Web Components에 대한 지원으로 @angular/elements 기능이 추가되어 Custom HTML Tag을 만들 수 있도록 지원한다. 본 글은 해당 사이트의 글Nx.dev 환경과 통합하여 개발하는 과정을 설명한다. Nx 환경은 mono repository 기반으로 multi application을 개발 할 수 있는 환경을 제공한다. Angular/CLI기반이지만 Angular, React, Node.js 개발까지 하나의 Git Repository안에서 개발하고 번들링 할 수 있도록 지원한다. 따라서 micro frontend에서 multi application 개발 잇점을 갖는다. 


블로그 소스 [GitHub]


NX 환경 준비

Angular v9.* 

@angular/cli v9.1.6

RxJS v6.5.*

Typescript v3.8.*

NodeJS v12.16.*

Node Version Manager(nvm)를 통해 로컬환경에 여러 Node버전을 관리하자.

// NodeJS
$ nvm install 12.16.2
$ nvm alias default 12.16.2
$ nvm use 12.16.2

// Angular/CLI 최신버전 사용
$ npm i -g @angular/cli@latest
$ npm i -g @nrwl/cli@latest
$ npm i -g yarn@latest

// local 설치
$ yarn add

NX workspace를 생성한다. 

$ npx create-nx-workspace@latest
// 선택 및 입력
? Workspace name (e.g., org name)     micro-demo
? What to create in the new workspace angular [a workspace with a single Angular application]
? Application name                    app-container
? Default stylesheet format           SASS(.scss)  [ http://sass-lang.com   ]


Web Components 개발 환경 설정

@angular/elements 를 설치한다. 

$ yarn add @angular/elements

UI Component로 ng-antd v9.1.* 를 사용한다. yarn 이 아니라 angular/cli의 'ng' 명령을 사용한다. Yes와 sidemenu 형태 선택한다.

$ ng add ng-zorro-antd

선택하기 
? Enable icon dynamic loading [ Detail: https://ng.ant.design/components/icon/en ] Yes
? Set up custom theme file [ Detail: https://ng.ant.design/docs/customize-theme/en ] Yes
? Choose your locale code: en_US
? Choose template to create project: sidemenu

설치 후에 Nx workspace와 ng-zorro-antd의 불일치를 해결한다.

  • apps/app-container/theme.less의 첫줄의 import 문구 수정
    • @import "../../../node_modules/ng-zorro-antd/ng-zorro-antd.less";
  • apps/app-container/index.html의 root tag 수정
    • <app-root></app-root>

설정 수정후 실행을 하면 sidemenu가 있는 환경이 자동 셋업되어 아래와 같이 보인다. 자세한 설치방법은 사이트를 참조한다.

$ ng serve --open

ng-zorro-antd 자동 적용 화면


Monitor Web Components 개발 및 번들링


monitor 애플리케이션을 신규 생성한다. 모니터 애플리케이션을 Web Components로 만들어 app-container 애플리케이션에서 동적으로 로딩해 본다. 

$ ng g app monitor

선택
? Which stylesheet format would you like to use? SASS(.scss)  [ http://sass-lang.com   ]
? Would you like to configure routing for this application? No

apps/monitor/src/app/app.component.html과 app.component.ts 를 변경한다. 

// app.component.html
{{title}} Application

// app.component.ts
import { Component, Input } from '@angular/core';

@Component({
  selector: 'micro-demo-root',
  templateUrl: './app.component.html',
  styleUrls: ['./app.component.scss'],
})
export class AppComponent {
  @Input() title = 'monitor';
}

apps/monitor/src/app/app.module.ts에서 Web Comopennts를 등록한다. 

import { BrowserModule } from '@angular/platform-browser';
import { NgModule, Injector } from '@angular/core';
import { createCustomElement } from '@angular/elements';

import { AppComponent } from './app.component';

@NgModule({
  declarations: [AppComponent],
  imports: [BrowserModule],
  providers: [],
  // 동적으로 생성하므로 entryComponents에 등록
  entryComponents: [AppComponent],
  // 정적 bootstrap을 사용하지 않음
  // bootstrap: [AppComponent],
})
export class AppModule {
  constructor(private injector: Injector) {}

  ngDoBootstrap() {
    // createCustomElement를 통해 Web Components 스펙에 맞는 객체로 반환
    const monitorApp = createCustomElement(AppComponent, { injector: this.injector });
    // browser window객체에 잇는 customElements를 통해 Web Components 등록
    customElements.define('monitor-app', monitorApp);
    // 사용방법: @Input() title이 있으므로 attribute 설정가능
    // <monitor-app title="Monitor Application"></monitor-app>
  }
}

monitor 애플리케이션을 번들링하면 여러개의 파일로 나오는데 번들링 파일을 최소화한다. ngDoBootstrap() 은 정적 bootstrap이 아닌 실행타임에 외부 컴포넌트를 동적으로 로딩할 때 애플케이션 root를 결정할 수 있게 한다. ngDoBootstrap에 대한 설명을 참조하자.

$ ng build monitor --prod --output-hashing=none

수행할 경우 main, polyfill, runtime등의 파일이 생성된다. 파일 최소화를 위해 ngx-build-plus 패키지를 이용한다. 

monitor 애플리케이션의 번들링된 파일들

ng add 명령으로 ngx-build-plus를 설치하고 애플리케이션은 monitor를 지정한다. 

$ ng add ngx-build-plus --project=monitor

ng add 로 수행을 하면 angular.json 파일의 설정을 자동으로 적용해 준다. builder의 명령어를 자동 수정함.

    "monitor": {
      "projectType": "application",
      "schematics": {
        "@nrwl/angular:component": {
          "style": "scss"
        }
      },
      "root": "apps/monitor",
      "sourceRoot": "apps/monitor/src",
      "prefix": "micro-demo",
      "architect": {
        "build": {
          "builder": "ngx-build-plus:browser",  <== builder가 자동 변경됨
          "options": {
          ...
          

다시 명령으로 monitor 애플리케이션을 번들링한다. ngx-build-plus로 확장한 옵션인 --single-bundle true를 추가한다.

$ ng build monitor --prod --output-hashing=none --single-bundle true

main, polyfill로 압축된 번들링 파일

main과 polyfill을 합쳐주는 스크립트를 등록한다. Mac/Linux기준 명령이다. micro-demo 폴더 밑에 buildSingle.sh 파일을 생성한다. 번들링파일 합치는 명령을 넣는다.  


#!/bin/sh
ng build monitor --prod --output-hashing=none --single-bundle true && cat dist/apps/monitor/main-es5.js dist/apps/monitor/polyfills-es5.js > apps/app-container/src/assets/monitor-es5.js


buildSingle.sh를 수행한 결과 파일은 app-container의 apps/app-container/src/assets/monitor-es5.js 쪽으로 copy된다.


컨테이너 애플리케이션에서 동적로딩

Web Components 스펙을 기준으로 monitor 애플리케이션을 번들링 했기때문에 프레임워크의 종류에 상관없이 <monitor-app> 태그를 사용할 수 있다. 정적으로 사용하는 방법을 살펴보자.


apps/app-container/src/app/pages/welcome/welcome.component.ts에서 monitor-es5.js파일을 import한다. 

import { Component, OnInit } from '@angular/core';
// 소스 import
import '../../../assets/monitor-es5.js';  

@Component({
  selector: 'app-welcome',
  templateUrl: './welcome.component.html',
  styleUrls: ['./welcome.component.scss']
})
export class WelcomeComponent implements OnInit {

  constructor() { }

  ngOnInit() {
  }

}


테스트를 위해 welcome.component.html 에 <monitor-app>태그를 설정해 보자. 

<monitor-app title="Hi Monitor"></monitor-app>


여기까지하고 수행을 하면 <monitor-app> 태그를 해석할 수 없다고 Angular가 에러를 뱃는다. <monitor-app> 은 Angular가 해석하는 것이 아니라 Browser에서 해석되는 Web Components이므로 무시하도록 welcome.module.ts에 CUSTOM_ELEMENTS_SCHEMA를 설정한다. 


import { NgModule, CUSTOM_ELEMENTS_SCHEMA } from '@angular/core';
import { WelcomeRoutingModule } from './welcome-routing.module';
import { WelcomeComponent } from './welcome.component';

@NgModule({
  imports: [WelcomeRoutingModule],
  declarations: [WelcomeComponent],
  schemas: [CUSTOM_ELEMENTS_SCHEMA],
  exports: [WelcomeComponent]
})
export class WelcomeModule { }


설정한 "Hi Monitor"와 함께 <monitor-app>이 출력
브라우져가 해석한 <monitor-app> 태그


<monitor-app>태그를 설정하지 않고 Javascript를 이용하여 로딩해 본다. 

apps/app-container/src/app/monitor.service.ts 파일을 생성한다. 

  • monitor-es5.js 파일 동적 로딩
  • <monitor-app> DOM 동적 추가
import { Injectable } from '@angular/core';

@Injectable({providedIn: 'root'})
export class MonitorLoaderService {
  loaded = false;

  constructor() { }

  // script 동적 로딩
  loadMonitorScript(): void {
    if (this.loaded) {
      return;
    }

    const script = document.createElement('script');
    script.src = 'assets/monitor-es5.js';
    document.body.appendChild(script);
    this.loaded = true;
  }

  // <monitor-app> 태그 추가
  addMonitorApp(): void {
    const tile = document.createElement('monitor-app');
    // @Input() 내용은 setAttribute로 추가 가능
    tile.setAttribute('title', 'Dynamic Load Monitor');

    const content = document.getElementById('content');
    content.appendChild(tile);
  }
}


 위의 경우 monitor-es5.js 파일을 별도로 다운로드받아 동적 로딩을 수행한다. 

monitor-es5.js 파일을 <script> 태그 추가후 동적으로 다운로드 받음


공통 파일 빼고 번들링하기

만일 app-container과 monitor 에서 사용하는 공통 패키지의 버전이 같다면, app-container 애플리케이션과 monitor 애플리케이션이 공통으로 사용하는 파일중, monitor 애플리케이션을 번들링할 때 공통파일을 제거하는 방법에 대해 알아보자. 제거를 통해 monitor 애플리케이션의 번들링 사이즈를 줄일 수 있다. 이는 Network payload time을 줄여주는 결과를 갖는다. 


ngx-build-plus를 이용해서 @angular/cli의 webpack externals 을 자동 생성한다. (참조)

$ ng g ngx-build-plus:externals --project monitor

수행을 하면 angular.json 파일에 별도 환경이 추가되고, apps/monitor/webpack.externals.js 파일이 생성된다. angular.json 내용중

"node_modules/@angular/elements/bundles/elements.umd.js", 내용은 제거한다. elements.umd.js를 공통파일로 빼서 사용하는데 오류가 있다. 

elements.umd.js 를 포함시킬 경우 오류가 발생함

angular.json의 monitor 애플리케이션으 "scripts" 설정 내역 => scripts.js 파일에 설정한 *.umd.js 파일을 합친다.

// angular.json 내의 monitor 애플리케이션 설정
// "scripts"에 externals로 참조하는 파일 설정이 자동으로 입력되어 진다.
    "monitor": {
      "projectType": "application",
      "schematics": {
        "@nrwl/angular:component": {
          "style": "scss"
        }
      },
      "root": "apps/monitor",
      "sourceRoot": "apps/monitor/src",
      "prefix": "micro-demo",
      "architect": {
        "build": {
          "builder": "ngx-build-plus:browser",
          "options": {
            "outputPath": "dist/apps/monitor",
            "index": "apps/monitor/src/index.html",
            "main": "apps/monitor/src/main.ts",
            "polyfills": "apps/monitor/src/polyfills.ts",
            "tsConfig": "apps/monitor/tsconfig.app.json",
            "aot": true,
            "assets": [
              "apps/monitor/src/favicon.ico",
              "apps/monitor/src/assets"
            ],
            "styles": [
              "apps/monitor/src/styles.scss"
            ],
            "scripts": [
              "node_modules/rxjs/bundles/rxjs.umd.js",
              "node_modules/@angular/core/bundles/core.umd.js",
              "node_modules/@angular/common/bundles/common.umd.js",
              "node_modules/@angular/common/bundles/common-http.umd.js",
              "node_modules/@angular/compiler/bundles/compiler.umd.js",
              "node_modules/@angular/elements/bundles/elements.umd.js", // <-- 제거한다
              "node_modules/@angular/platform-browser/bundles/platform-browser.umd.js",
              "node_modules/@angular/platform-browser-dynamic/bundles/platform-browser-dynamic.umd.js"
            ]
          },

apps/monitor/webpack.externals.js  파일내역에서 ng.elements도 주석처리한다.  => monitor-es5.js 파일에서 제거되는 파일목록이다.

const webpack = require('webpack');

module.exports = {
    "externals": {
        "rxjs": "rxjs",
        "@angular/core": "ng.core",
        "@angular/common": "ng.common",
        "@angular/common/http": "ng.common.http",
        "@angular/platform-browser": "ng.platformBrowser",
        "@angular/platform-browser-dynamic": "ng.platformBrowserDynamic",
        "@angular/compiler": "ng.compiler",
        // "@angular/elements": "ng.elements",  <-- 주석처리한다.

        // Uncomment and add to scripts in angular.json if needed
        // "@angular/router": "ng.router",
        // "@angular/forms": "ng.forms"
    }
}

buildSingle.sh 내용을 수정한다. scripts.js 파일은 window.ng.core 또는 window.ng.common과 같은 global 객체가 담겨있는 파일이다. 따라서 scripts.js는 app-container 애플리케이션에서 최초 한번만 로딩하면 되고, 이후 monitor 애플리케이션과 같은 web components는 번들 파일은 자신의 내용만을 포함한다.


monitor app size including common library  - 129KB

common library를 포함한 사이즈 - 129KB

monitor app size excluding common library - 19KB

monitor app과 @angular/elements만 포함한 사이즈 - 19KB

#!/bin/sh
ng build monitor --prod --extra-webpack-config=apps/monitor/webpack.externals.js --output-hashing=none --single-bundle true && cat dist/apps/monitor/main-es5.js dist/apps/monitor/polyfill-es5.js > apps/app-container/src/assets/monitor-es5.js
cat dist/apps/monitor/scripts.js > apps/app-container/src/assets/scripts.js

scripts.js 파일은 angular.json 의 app-container 애플리케이션 "scripts" 옵션에 추가한다. 

    "app-container": {
      "projectType": "application",
      "schematics": {
        "@nrwl/angular:component": {
          "style": "scss"
        }
      },
      "root": "apps/app-container",
      "sourceRoot": "apps/app-container/src",
      "prefix": "micro-demo",
      "architect": {
        "build": {
          "builder": "@angular-devkit/build-angular:browser",
          "options": {
            "outputPath": "dist/apps/app-container",
            "index": "apps/app-container/src/index.html",
            "main": "apps/app-container/src/main.ts",
            "polyfills": "apps/app-container/src/polyfills.ts",
            "tsConfig": "apps/app-container/tsconfig.app.json",
            "aot": true,
            "assets": [
              "apps/app-container/src/favicon.ico",
              "apps/app-container/src/assets",
              {
                "glob": "**/*",
                "input": "./node_modules/@ant-design/icons-angular/src/inline-svg/",
                "output": "/assets/"
              }
            ],
            "styles": [
              "apps/app-container/src/theme.less",
              "apps/app-container/src/styles.scss"
            ],
            "scripts": [
              "apps/app-container/src/assets/scripts.js"  <== 추가
            ]
          },

수행하면 네트워크에서 scripts.js 파일은 한번만 로딩되고, 이후 다양한 Web Components들은 자신의 애플리케이션 내역만 포함한 파일로 번들링하여 파일 사이즈를 줄일 수 있다. (참조)

Custom Element에서 common library를 window객체쪽으로 변경함.


scripts.js 로딩 후 monitor-es5.js 파일 로딩


참조

https://www.angulararchitects.io/aktuelles/angular-elements-part-i/


Angular Elements, Part I - ANGULARarchitects

A dynamic dashboard in four steps with Web Components

www.angulararchitects.io

https://ng.ant.design/docs/getting-started/en


NG-ZORRO - Ant Design Of Angular

An enterprise-class UI design language and Angular-based implementation with a set of high-quality Angular components, one of best Angular UI library for enterprises

ng.ant.design

https://medium.com/angular-in-depth/how-to-manually-bootstrap-an-angular-application-9a36ccf86429


How to manually bootstrap an Angular application

AngularInDepth is moving away from Medium. This article, its updates and more recent articles are hosted on the new platform inDepth.dev

medium.com

https://www.angulararchitects.io/aktuelles/your-options-for-building-angular-elements/


Your options for building Angular Elements - ANGULARarchitects

with the CLI

www.angulararchitects.io

https://indepth.dev/tiny-angular-application-projects-in-nx-workspaces/


Tiny Angular application projects in Nx workspaces

Use assets, styles, and environments workspace libraries to follow the Single Responsibility Principle. Step-by-step commands and instructions.

indepth.dev

https://nstudio.io/blog/custom-web-elements-with-angular-and-react


nstudio | Custom web elements for Angular and React with Nx + xplat

Passionate about implementing creative solutions for you. Technology, Consulting, Audio/Video Production. Web/Mobile apps, Angular/NativeScript plugins, Vue/NativeScript, product development, team training and help with project features/objectives.

nstudio.io


posted by 윤영식
2020. 5. 18. 14:56 React/Architecture

마이크로 프론트앤드는 마이크로 서비스처럼 전체 화면을 작동할 수 있는 단위로 나누어 개발한 후 서로 조립하는 방식이다. 여기서 작동 단위에 사용된 프론트앤드 프레임워크로 Angular 이든, React 또는 Vue 또는 Vanilla 자바스크립트에 상관하지 않고 조합 가능한 방법을 제공한다. 본글에서는 마이크로 프론트앤드 개발 방법중 Angular 프레임워크를 사용하면서 Web Components를 사용한 통합 방법에 대핸 알아보자.


마이크로 프론트앤드 기반 독립된 팀별 애플리케이션 개발


Micro Frontend 개념

마이크로 프론앤드 개념으로 개발을 하는 잇점은 대규모 엔터프라이즈 애플리케이션을 개발한다고 가정할 때, 각 팀별 또는 업무단위에 대해 Backend + Frontend 개발 후 통합하는 이슈를 줄일 수 있다. 

  • 작고, 응집력 있고 유지보수성을 가지는 코드베이스를 가질 수 있다. (Simple, decoupled codebase)
  • 분리배포가 용이하고, 자율적인 팀 조직운영이 수월해진다. (Independent deployment, Autonomous teams)
  • 프론트앤드 개발을 점진적 업그레이드 또는 재작성이 수월해진다. (Incremental upgrades)

하지만 단점도 존재한다. 

  • 배포 번들 사이즈가 커질 수 있다. (Payload size)
  • 서로간의 개발 환경의 차이로 복잡도가 올라간다. (Environment differences
  • 운영 및 거버넌스도 당연히 복잡해진다. (Operational governance complexity)

Thoughtworks의 Technology Radar에 의하면 Micro Frontend가 현재 적용 가능한(Adapt) 상황이다.

마틴 파울러의 글 (또는 번역글) 에서 잘 설명을 하고 있으니 참조하자.


Micro Frontend 통합 방법

독립적인 개발 및 배포

마이크로 프론앤드 방식으로 개발 후 각 단위 애플리케이션을 어떻게 통합할지 고려해야 한다. 통합할 때는 각 화면을 조합하는 컨테이너 애플리케이션이 있고, 그 하부에 들어가는 단위 애플리케이션이 존재한다. (참조)

  • 서버 템플릿 통합: 각 서버로 html 템플릿을 요청하고, 최종 응답서버에서 각 템플릿을 조합해서 응답을 보냄
    • 서버측에서 최종 화면을 조합한다.
  • 빌드타임 통합: 단위 애플리케이션을 패키지로 배포하고, package.json에 명시한 후 컨테이너 애플리케이션에서 import하여 사용하는 방법
    • 각 애플리케이션에 대한 런타임 대응이 안된다. 
    • 애플리케이션을 릴리즈하고 최종 애플리케이션에서 컴파일해야 한다. 
  • iframe 통합: 전통적인 방식이면서 가장 쉬운 방식이다.
    • 애플리케이션 통합의 유연성 높다.
    • 애플리케이션의 기술 종속성이 없다. 
    • routing, history, deep-link같은 것이 복잡해질 수 있다. 
    • 컨테이너 애플리케이션과 iframe에 들어가는 단위 애플리케이션간의 통신규약도 필요하다. 
    • UX가 iframe안에 갇히기 때문에 어색한 UI 표현을 가질 수 있다. 
  • Javascript를 통한 런타임 통합: iframe과 달리 유연한 통합이 가능하다. 현실적으로 가장 많이 사용하는 방식이다.
    • 컨테이너 애플리케이션을 단위 애플리케이션 번들을 <script> 태그를 통합 다운로드 받고
    • 약속된 초기화 메소드를 호출한다.
    • 클라이언트측에서 (브라우져) 통합한다.
  • Web Components를 통한 통합: HTML 커스텀 엘리먼트를 통한 통합방법, static, runtime 통합 둘 다 가능함.
    • Javascript를 통한 런타임 통합과 유사하지만 "The web component way"를 지향한다.
    • 클라이언트측에서 (브라우져) 통합한다.

Mirco Frontend 통합할 때 몇가지 고려사항

  • UI 스타일 일관성은 UI Component Library를 만들어 대응한다.
    • 한번에 만들지 말고, 중복코드가 발생하는 지점에서 만들고
    • 코드 일관성을 유지하는 팀이 수행한다. 
  • 어플리케이션 통신은 Custom events를 사용한다.
    • 커스텀 이벤트를 위해 PubSubJS를 고려해 보자.
    • 호출시 URL 라우팅에 넘기기
  • 백앤드 호출 API 구성
    • BFF(Backend for Frontend Pattern) 패턴으로 프론트앤드 전용 API를 갖는다. 
    • 별도의 데이터베이스를 가질 수도 있다.
    • 로그인은 인증 정보는 통합하는 Container가 소유한다. 

프론트앤드와 백앤드의 구조화


참조

https://micro-frontends.org/


Micro Frontends - extending the microservice idea to frontend development

Techniques, strategies and recipes for building a modern web app with multiple teams using different JavaScript frameworks.

micro-frontends.org

https://martinfowler.com/articles/micro-frontends.html


Micro Frontends

How to split up your large, complex, frontend codebases into simple, composable, independently deliverable apps.

martinfowler.com

번역글: https://medium.com/@juyeon.kate/micro-frontends-%EB%B2%88%EC%97%AD%EA%B8%80-1-5-29c80baf5df


Micro Frontends 번역글 1/5

이 글은, https://martinfowler.com/articles/micro-frontends.html 페이지를 번역한 글 입니다.

medium.com

https://www.thoughtworks.com/radar/techniques/micro-frontends


Micro frontends | Technology Radar | ThoughtWorks

This Technology Radar quadrant explores the techniques being used to develop and deliver software

www.thoughtworks.com

https://www.angulararchitects.io/aktuelles/angular-elements-part-i/


Angular Elements, Part I - ANGULARarchitects

A dynamic dashboard in four steps with Web Components

www.angulararchitects.io


posted by 윤영식
prev 1 next