블로그 이미지
윤영식
Full Stacker, Application Architecter, KnowHow Dispenser and Bike Rider

Publication

Category

Recent Post

2021. 9. 30. 13:22 React/Architecture


NestJS에서 제공하는 Auth와 Role 기능을 확장해 본다. NestJS는 그외 Configuration, Logging, Filter, Interceptor등 다양한 기능을 확장하여 적용할 수 있도록 한다. 


Role 데코레이터 추가

Role 체크를 위한 데코레이터를 libs/shared/src/lib/decorator/roles.decorator.ts 를 추가한다.

// roles.decorator.ts
import { SetMetadata } from '@nestjs/common';

export const Roles = (...roles: string[]) => SetMetadata('roles', roles);


Role 가드 추가

request시에 user 정보의 role을 통해 match되는지를 체크하는 가드(guard)를 libs/shared/src/lib/guard/role.guard.ts 추가한다. 

  • 요구하는 roles가 없으면 bypass 한다.
  • user가 없다면 즉, 로그인한 사용자가 아니거나, Login Token이 없다면 Forbidden 에러를 발생시킨다.
// role.guard.ts
import { Injectable, CanActivate, ExecutionContext, ForbiddenException } from '@nestjs/common';
import { Reflector } from '@nestjs/core';

const matchRoles = (roles: string[], userRoles: string) => {
  return roles.some(role => role === userRoles);
};

@Injectable()
export class RolesGuard implements CanActivate {
  constructor(private reflector: Reflector) { }

  canActivate(context: ExecutionContext): boolean {
    const requiredRoles = this.reflector.getAllAndOverride<string[]>('roles', [
      context.getHandler(),
      context.getClass(),
    ]);
    if (!requiredRoles) {
      return true;
    }

    const req = context.switchToHttp().getRequest() as any;
    const user = req.user;
    if (!user) {
      throw new ForbiddenException('User does not exist');
    }
    return matchRoles(requiredRoles, user.role);
  }
}


로그인후 express의 request에 user 객체 할당

로그인을 하면 사용자 정보가 Token에 담긴다. @Role 데코레이터를 체크하기 전에 Token 정보를 기반으로 user 정보를 추출한다. 

  • 로그인 토큰: LOGIN_TOKEN

libs/domain/src/lib/auth/auth.middleware.ts 파일을 생성하고, 쿠키의 LOGIN_TOKEN에서 user정보를 얻는다.

import { ForbiddenException, Injectable, NestMiddleware } from '@nestjs/common';
import { Request, Response, NextFunction } from 'express';
import { verify } from 'jsonwebtoken';

import { loadConfigJson } from '@rnm/shared';
const config: any = loadConfigJson();

@Injectable()
export class AuthMiddleware implements NestMiddleware {
  use(req: Request, res: Response, next: NextFunction) {
    if (req.user) {
      next();
      return;
    }
    
    const accessToken = req?.cookies?.LOGIN_TOKEN;
    let user;
    try {
      user = verify(
        accessToken,
        config?.AUTH?.SECRET,
      );
    } catch (error) {
      throw new ForbiddenException('Please register or sign in.');
    }

    if (user) {
      req.user = user;
    }
    next();
  }
}

request에 user를 할당하는 미들웨어와 Role Guard를 apps/gateway/api/src/app/app.module.ts 에 설정한다. 

  • RolesGuard 등록
  • AuthMiddleware path들 등록
// app.module.ts
import { join } from 'path';
import { MiddlewareConsumer, Module, NestModule, RequestMethod } from '@nestjs/common';
import { APP_FILTER, APP_GUARD } from '@nestjs/core';
import { ServeStaticModule } from '@nestjs/serve-static';
import { TypeOrmModule } from '@nestjs/typeorm';
import { getMetadataArgsStorage } from 'typeorm';

import { GatewayApiAppService, EntitiesModule, AuthModule, AuthMiddleware } from '@rnm/domain';
import { GlobalExceptionFilter, ormConfigService, RolesGuard } from '@rnm/shared';

import { DashboardModule } from './dashboard/microservice/dashboard.module';
import { ConfigurationModule } from './configuration/microservice/configuration.module';
import { BackOfficeModule } from './back-office/microservice/back-office.module';
import { AppController } from './app.controller';
import { AuthController } from './auth/auth.controller';
import { UserController } from './user/user.controller';

@Module({
  imports: [
    ServeStaticModule.forRoot({
      rootPath: join(__dirname, 'public'),
      exclude: [
        '/api/auth*',
        '/api/gateway*', '/api/dashboard*', '/api/configuration*', '/api/back-office*',
        '/dashboard*', '/configuration*', '/back-office*'
      ],
    }),
    // ORM
    TypeOrmModule.forRoot({
      ...ormConfigService.getTypeOrmConfig(),
      entities: getMetadataArgsStorage().tables.map(tbl => tbl.target)
    }),
    EntitiesModule,
    // MicroService
    DashboardModule,
    ConfigurationModule,
    BackOfficeModule,
    // Auth
    AuthModule
  ],
  controllers: [
    AuthController,
    AppController,
    UserController
  ],
  providers: [
    GatewayApiAppService,
    // Global Exception Filter
    {
      provide: APP_FILTER,
      useClass: GlobalExceptionFilter,
    },
    // 1) Role Guard 등록
    {
      provide: APP_GUARD,
      useClass: RolesGuard,
    },
  ]
})
export class AppModule implements NestModule {
  // 2) Auth Middleware 등록
  configure(consumer: MiddlewareConsumer) {
    consumer
      .apply(AuthMiddleware)
      .forRoutes(...[
        { path: '/dashboard*', method: RequestMethod.ALL },
        { path: '/configuration*', method: RequestMethod.ALL },
        { path: '/back-office*', method: RequestMethod.ALL },
        { path: '/api*', method: RequestMethod.ALL },
      ]);
  }
}


Role 사용하기

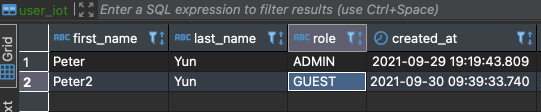
user 테이블에 Role이 저장되어있다. 

user.model.ts 소스에 UserRole enum을 추가한다. 

// user.model.ts
export interface User {
  id?: number;
  username: string;
  password?: string;
  email?: string;
  firstName?: string;
  lastName?: string;
  role?: string;
  sub?: string | number;
  currentHashedRefreshToken?: string;
}
export type LoginDto = Pick<User, 'username' | 'password'>;
export type TokenPayload = Omit<User, 'password'>;

// User Role
export enum UserRole {
  ADMIN = 'ADMIN',
  MANAGER = 'MANAGER',
  CUSTOMER = 'CUSTOMER',
  GUEST = 'GUEST',
}

apps/gateway/api/src/app/user/user.controller.ts 안에 @Roles을 적용한다. 

// user.controller.ts
import { Body, Controller, Delete, Get, Param, Post, Put, UseGuards } from '@nestjs/common';

import { JwtAuthGuard, UserService } from '@rnm/domain';
import { User, UserRole } from '@rnm/model';
import { Roles } from '@rnm/shared';

@Controller('api/gateway/user')
export class UserController {
  constructor(
    private readonly service: UserService
  ) { }

  @UseGuards(JwtAuthGuard)
  @Post()
  @Roles(UserRole.ADMIN, UserRole.MANAGER) // <== 요기
  async create(@Body() data: User): Promise<User> {
    const savedUser = await this.service.create(data);
    if (!savedUser) {
      return;
    }
    return savedUser;
  }
  ....
 }


이후 열심히 사용해 보자.

소스: https://github.com/ysyun/rnm-stack/releases/tag/ms-8


Release ms-8 · ysyun/rnm-stack

[ms-8] added role guard for authorization

github.com


<참조>

- NestJS Authorization: https://docs.nestjs.kr/security/authorization


네스트JS 한국어 매뉴얼 사이트

네스트JS 한국, 네스트JS Korea 한국어 매뉴얼

docs.nestjs.kr

- JWT Role based authentication: https://github.com/rangle/jwt-role-based-authentication-examples


GitHub - rangle/jwt-role-based-authentication-examples: Implement the same backend using graphql, nestjs and deno.

Implement the same backend using graphql, nestjs and deno. - GitHub - rangle/jwt-role-based-authentication-examples: Implement the same backend using graphql, nestjs and deno.

github.com


posted by 윤영식
2021. 9. 27. 18:04 React/Architecture

Micro Service의 앞단 Gateway에서 모든 호출에 대한 인증/인가를 처리한다. 먼저 JWT기반 인증에 대한 설정을 한다. 

  • passwort jwt 설정


JWT 처리를 위한  패키지 설치

passport를 통해 JWT를 관리한다.

  • userId/password 기반은 passport-local을 사용
  • JWT 체크 passport-jwt 사용
  • 추가적으로 http security를 위해 express middleware인 helmet 적용
$> yarn add @nestjs/jwt @nestjs/passport passport passport-local passport-jwt helmet
$> yarn add -D @types/passport-local @types/passport-jwt @types/express


Passport Local 적용

  • libs/domain/src/lib/auth/strategies 폴더 생성
  • local.strategy.ts 파일 생성
// local.strategy.ts
import { Injectable, UnauthorizedException } from '@nestjs/common';
import { PassportStrategy } from '@nestjs/passport';
import { Strategy } from 'passport-local';
import { AuthService } from '../auth.service';

@Injectable()
export class LocalStrategy extends PassportStrategy(Strategy) {
  constructor(private readonly authService: AuthService) {
    super();
  }

  async validate(username: string, password: string): Promise<any> {
    const user = await this.authService.validateUser(username, password);
    if (!user) {
      throw new UnauthorizedException({
        error: 'Incorrect username and password'
      });
    }
    return user;
  }
}


Username/Password 체크하기

libs/domain/src/lib/auth/  폴더 생성하고, auth.service.ts 파일을 생성한다. 

  • validateUser: LocalStrategy에서 호출한다. username/password 로그인 유효성을 login 호출 이전에 체크한다.
  • login: validate user인 경우 사용자 정보를 통한 webtoken 생성
// auth.service.ts
import { Injectable, UnauthorizedException } from '@nestjs/common';
import { JwtService } from '@nestjs/jwt';

import { User } from '../entities/user/user.model';
import { UserService } from '../entities/user/user.service';
import { bcryptCompare } from '../utilties/bcrypt.util';

@Injectable()
export class AuthService {
  constructor(
    private readonly userService: UserService,
    private readonly jwtService: JwtService,
  ) { }

  async validateUser(username: string, pass: string): Promise<any> {
    const user: any = await this.userService.findOne(username) || {};
    if (user && pass === user.password) {
      const { password, ...result } = user;
      return result;
    }
    return null;
  }

  async login(loginUser: User): Promise<any> {
    const user = await this.userService.findOne(loginUser.username);
    if (user) {
      const payload = { username: user.username, sub: user.id, email: user.email, role: user.role };
      return {
        access_token: this.jwtService.sign(payload),
      };
    } else {
      throw new UnauthorizedException({
        error: 'There is no user'
      });
    }
  }
}

토큰 생성확인은 https://jwt.io/ 에서 할 수 있다. 


libs/domain/src/lib/auth/auth.module.ts 파일을 생성하고, config.json파일에 AUTH 프로퍼티를 추가한다. 

  • JwtModule을 등록한다. 
  • secret은 반드시 별도의 환경설정 파일에서 관리한다. 
  • AuthService도 등록한다.
  • User 정보를 read하기 위해 EntitiesModule도 imports 에 설정한다.
// apps/gateway/api/src/environments/config.json
{
  "HTTP_PORT": 8000,
  "AUTH": {
    "SECRET": "iot_secret_auth",
    "EXPIRED_ON": "1d"
  },
  ...
}

// auth.module.ts
import { Module } from '@nestjs/common';
import { JwtModule } from '@nestjs/jwt';
import { PassportModule } from '@nestjs/passport';

import { GatewayConfiguration, loadConfigJson } from '@rnm/shared';
import { EntitiesModule } from '../entities/entity.module';

import { AuthService } from './auth.service';
import { JwtStrategy } from './strategies/jwt.strategy';
import { LocalStrategy } from './strategies/local.strategy';

const config: GatewayConfiguration = loadConfigJson();

@Module({
  imports: [
    PassportModule,
    JwtModule.register({
      secret: config.AUTH?.SECRET,
      signOptions: { expiresIn: config.AUTH?.EXPIRED_ON },
    }),
    EntitiesModule
  ],
  providers: [AuthService, LocalStrategy, JwtStrategy],
  exports: [AuthService],
})
export class AuthModule { }


Passport JWT 적용

로그인이 성공하면 jsonwebtoken 을 생성하고, 이후 request(요청)에 대해 JWT를 체크하는 환경설정을 한다.

  • libs/domain/src/lib/auth/strategies/jwt.strategy.ts 파일  생성
    • request header의 Bearer Token 체크 => Cookie 사용으로 변경 (master branch소스 참조)
    • 확인하는 secret 설정
  • AuthModule에 등록한다.
// jwt.strategy.ts
import { Injectable } from '@nestjs/common';
import { PassportStrategy } from '@nestjs/passport';
import { ExtractJwt, Strategy } from 'passport-jwt';
import { Request } from 'express';

import { loadConfigJson } from '@rnm/shared';
const config: any = loadConfigJson();

@Injectable()
export class JwtStrategy extends PassportStrategy(Strategy) {
  constructor() {
    super({
      // jwtFromRequest: ExtractJwt.fromAuthHeaderAsBearerToken(),
      // Cookie를 사용한다
      jwtFromRequest: ExtractJwt.fromExtractors([(request: Request) => {
        return request?.cookies?.LOGIN_TOKEN;
      }]),
      ignoreExpiration: false,
      secretOrKey: config?.AUTH?.SECRET
    });
  }

  async validate(user: any): Promise<any> {
    // return { id: payload.sub, username: payload.username };
    return user;
  }
}


Password 암호화

암호화 모듈 설치

$> yarn add bcrypt
$> yarn add -D @types/bcrypt

암호화 유틸리티를 생성한다. libs/domain/src/lib/utilties/bcrypt.util.ts 파일 생성

  • 사용자 생성시 패스워드
  • 입력 패스워드를 DB의 암호화된 패스워드와 비교한다.
import * as bcrypt from 'bcrypt';

// 사용자의 패스워드 암호화
export const bcryptHash = (plainText: string, saltOrRounds = 10): Promise<string> => {
  return bcrypt.hash(plainText, saltOrRounds);
}

// 입력 패스워드와 DB 패스워드 비교
export const bcryptCompare = (plainText: string, hashedMessage: string): Promise<boolean> => {
  return bcrypt.compare(plainText, hashedMessage);
}

libs/domain/src/lib/auth/auth.service.ts 의 validateUser에서 암호화된 password를 체크토록 수정한다.

// auth.service.ts
import { bcryptCompare } from '../utilties/bcrypt.util';

@Injectable()
export class AuthService {
  constructor(
    private readonly userService: UserService,
    private readonly jwtService: JwtService,
  ) { }

  async validateUser(username: string, pass: string): Promise<any> {
    const user: any = await this.userService.findOne(username) || {};
    // 암호화된 패스워드를 입력 패스워드와 같은지 비교
    const isMatch = await bcryptCompare(pass, user.password);
    if (user && isMatch) {
      const { password, ...result } = user;
      return result;
    }
    return null;
  }
  ...
}


로그인 하기

  • apps/gateway/api/src/app/auth/auth.controller.ts 파일을 신규 생성.
  • apps/gateway/api/src/app/app.module.ts 설정
    • "auth/login" API에 대해 static server에 exclude 설정
    • AuthModule imports에 설정
    • AuthController 등록
// auth.controller.ts
import { Body, Controller, Post, UseGuards } from '@nestjs/common';

import { AuthService, LocalAuthGuard, User } from '@rnm/domain';

@Controller()
export class AuthController {
  constructor(
    private readonly authService: AuthService
  ) { }

  @UseGuards(LocalAuthGuard)
  @Post('auth/login')
  async login(@Body() user: User): Promise<Response> {
    return this.authService.login(user);
  }
}

// app.module.ts
@Module({
  imports: [
    ServeStaticModule.forRoot({
      rootPath: join(__dirname, 'public'),
      exclude: [
        '/auth/*',
        '/api/gateway*', '/api/dashboard*', '/api/configuration*', '/api/back-office*',
        '/dashboard*', '/configuration*', '/back-office*'
      ],
    }),
    // ORM
    TypeOrmModule.forRoot({
      ...ormConfigService.getTypeOrmConfig(),
      entities: getMetadataArgsStorage().tables.map(tbl => tbl.target)
    }),
    EntitiesModule,
    // MicroService
    DashboardModule,
    // Auth
    AuthModule
  ],
  controllers: [
    AppController,
    AuthController,
    UserController
  ],
  providers: [GatewayApiAppService]
})
export class AppModule { }


UseGuard에서 username/password는  LocalAuthGuard를 등록한다. 이를 위해 libs/domain/src/lib/auth/guards/local-auth.guard.ts 파일 생성한다.

import { Body, Controller, Delete, Get, Param, Post, Put, UseGuards } from '@nestjs/common';

import { JwtAuthGuard, User, UserService } from '@rnm/domain';

@Controller('api/gateway/user')
export class UserController {
  constructor(
    private readonly service: UserService
  ) { }

  @UseGuards(JwtAuthGuard)
  @Post()
  create(@Body() data: User): Promise<User> {
    return this.service.create(data);
  }

  @UseGuards(JwtAuthGuard)
  @Put(':id')
  updateOne(@Param('id') id: number, @Body() data: User): Promise<any> {
    return this.service.updateOne(id, data);
  }

  @UseGuards(JwtAuthGuard)
  @Get()
  findAll(): Promise<User[]> {
    return this.service.findAll();
  }

  @UseGuards(JwtAuthGuard)
  @Get(':username')
  findOne(@Param('username') username: string): Promise<User | undefined> {
    return this.service.findOne(username);
  }

  @UseGuards(JwtAuthGuard)
  @Delete(':id')
  deleteOne(@Param('id') id: string): Promise<any> {
    return this.service.deleteOne(id);
  }
}
import { Injectable } from '@nestjs/common';
import { AuthGuard } from '@nestjs/passport';

@Injectable()
export class LocalAuthGuard extends AuthGuard('local') { }

User 생성하는 apps/gateway/api/src/app/user/user.controller.ts 에도 @UseGuards 를 JWT 토큰 체크하는 Guard로 등록한다. 이를 위하여 libs/domain/src/lib/auth/guards/jwt-auth.guard.ts 파일을 생성한다. 

import { ExecutionContext, Injectable, UnauthorizedException } from '@nestjs/common';
import { AuthGuard } from '@nestjs/passport';

@Injectable()
export class JwtAuthGuard extends AuthGuard('jwt') {
  canActivate(context: ExecutionContext) {
    // Add your custom authentication logic here
    // for example, call super.logIn(request) to establish a session.
    return super.canActivate(context);
  }

  handleRequest(err: any, user: any, info: any, context: any, status?: any) {
    // You can throw an exception based on either "info" or "err" arguments
    if (err || !user) {
      throw err || new UnauthorizedException();
    }
    return user;
  }
}

그리고 apps/gateway/api/src/app/user/user.controller.ts 에 @UseGuards를 "JwtAuthGuard"로 등록한다. 

import { Body, Controller, Delete, Get, Param, Post, Put, UseGuards } from '@nestjs/common';

import { JwtAuthGuard, User, UserService } from '@rnm/domain';

@Controller('api/gateway/user')
export class UserController {
  constructor(
    private readonly service: UserService
  ) { }

  @UseGuards(JwtAuthGuard)
  @Post()
  create(@Body() data: User): Promise<User> {
    return this.service.create(data);
  }

  @UseGuards(JwtAuthGuard)
  @Put(':id')
  updateOne(@Param('id') id: number, @Body() data: User): Promise<any> {
    return this.service.updateOne(id, data);
  }

  @UseGuards(JwtAuthGuard)
  @Get()
  findAll(): Promise<User[]> {
    return this.service.findAll();
  }

  @UseGuards(JwtAuthGuard)
  @Get(':username')
  findOne(@Param('username') username: string): Promise<User | undefined> {
    return this.service.findOne(username);
  }

  @UseGuards(JwtAuthGuard)
  @Delete(':id')
  deleteOne(@Param('id') id: string): Promise<any> {
    return this.service.deleteOne(id);
  }
}

Postman으로 테스트 한다. 

소스: https://github.com/ysyun/rnm-stack/releases/tag/ms-6


Release ms-6 · ysyun/rnm-stack

[ms-6] add typeorm and jwt for auth

github.com

주의: 소스가 계속 업데이트되고 있기에 master branch를 참조해도 된다.


<참조>

- NestJS에 passport 기반 JWT 적용하기 

https://docs.nestjs.kr/security/authentication


네스트JS 한국어 매뉴얼 사이트

네스트JS 한국, 네스트JS Korea 한국어 매뉴얼

docs.nestjs.kr

- passport local 환경설정

http://www.passportjs.org/packages/passport-local/


passport-local

Local username and password authentication strategy for Passport.

www.passportjs.org

- passport-jwt 환경설정

https://www.passportjs.org/packages/passport-jwt/


passport-jwt

Passport authentication strategy using JSON Web Tokens

www.passportjs.org

- password 암호화

https://wanago.io/2020/05/25/api-nestjs-authenticating-users-bcrypt-passport-jwt-cookies/


API with NestJS #3. Authenticating users with bcrypt, Passport, JWT, and cookies

1. API with NestJS #1. Controllers, routing and the module structure2. API with NestJS #2. Setting up a PostgreSQL database with TypeORM3. API with NestJS #3. Authenticating users with bcrypt, Passport, JWT, and cookies4. API with NestJS #4. Error handling

wanago.io

posted by 윤영식
2018. 11. 22. 14:37 Meteor/React + Meteor

Meteor의  accounts-password를 패키지를 통한 로그인 환경 만들기를 해본다. 


  - accounts-password 패키지를 통한 미티어 사용자 가입/로그인 사용 방법 알기

  - React Router 설정

  - 미티어의 Tracker.autorun을 통해 reactivity computation과 resource 사용 방법 알기

  - 소스코드


미티어 사용자 관리


accounts-password 패키지를 설치하고, 가입 및 로그인 화면을 만든다. 

$ meteor add accounts-password

$ meteor npm install --save bcrypt

// Link 사용을 위해 

$ meteor npm install --save react-router-dom


Signup.tsx와 Login.tsx 생성한다. 

  - email, password의 값을 읽기 위하여 typescript방식의 public refs를 정의한다. 

  - Accounts.createUser를 통해 사용자를 등록한다.

// Singup.tsx

import * as React from 'react';

import { Link } from 'react-router-dom';

import { Accounts } from 'meteor/accounts-base'


export interface SignupProps {}

export default class Signup extends React.Component<SignupProps, any> {

  // @see https://goenning.net/2016/11/02/strongly-typed-react-refs-with-typescript/

  public refs: {

    email: HTMLInputElement,

    password: HTMLInputElement

  }


  constructor(props) {

    super(props);

    this.state = {

      error: ''

    };

  }


  onCreateAccount = (e: any) => {

    e.preventDefault();

    let email = this.refs.email.value.trim();

    let password = this.refs.password.value.trim();

    Accounts.createUser({email, password}, (err) => {

      if (err) {

        this.setState({ error: err.reason });

      } else {

        this.setState({ error: '' });

      }

    });

  }


  public render() {

    return (

      <div>

        <h1>Signup to short Link</h1>

        { this.state.error ? <p>{this.state.error} </p> : undefined}

        <form onSubmit={this.onCreateAccount}> 

          <input type="email" ref="email" name="email" placeholder="Email"/>

          <input type="password" ref="password" name="password" placeholder="Password"/>

          <button>Create Acount</button>

        </form>

        <Link to="/login">Already have a account?</Link>

      </div>

    );

  }

}


Login.tsx

  - refs 정의

  - Meteor.loginWithPassword를 통해 로그인한다.

import * as React from 'react';

import { Link } from 'react-router-dom';

import { Meteor } from 'meteor/meteor';


export interface LoginProps {

  history: any;

}

export default class Login extends React.Component<LoginProps, any> {

  public refs: {

    email: HTMLInputElement,

    password: HTMLInputElement

  }


  constructor(props) {

    super(props);

    this.state = {

      error: ''

    };

  }


  onLogin = (e: any) => {

    e.preventDefault();

    let email = this.refs.email.value.trim();

    let password = this.refs.password.value.trim();

    Meteor.loginWithPassword({ email }, password, (err) => {

      if (err) {

        this.setState({ error: err.reason });

      } else {

        this.setState({ error: '' });

      }

    });

  }


  public render() {

    return (

      <div>

        <h1>Login to short Link</h1>

        {this.state.error ? <p>{this.state.error} </p> : undefined}

        <form onSubmit={this.onLogin}>

          <input type="email" ref="email" name="email" placeholder="Email" />

          <input type="password" ref="password" name="password" placeholder="Password" />

          <button>Login</button>

        </form>

        <Link to="/signup">Have a account?</Link>

      </div>

    );

  }

}


NotFound.tsx 파일도 생성한다. 

import * as React from 'react';

export default () => <div>Not Found Page</div>


React Router 설정


라우팅 설정을 통해 가입, 로그인후 Link화면으로 이동하는 설정한다. 


history 모듈을 설치한다.

$ meteor npm install --save history


client/main.tsx에 Route설정을 한다.

import * as React from 'react';

import { Meteor } from 'meteor/meteor';

import { render } from 'react-dom';

import { Provider } from 'react-redux';

import { Route, Router, Switch } from 'react-router-dom';

import { createBrowserHistory } from 'history';


import App from '../imports/ui/App'

import Login from '../imports/ui/pages/Login';

import Signup from '../imports/ui/pages/Signup';

import InfoContainer from '../imports/ui/Info';

import NotFound from '../imports/ui/pages/NotFound';

import store from '../imports/ui/store';


const browserHistory = createBrowserHistory();

const Root = (

  <Provider store={store}>

    <Router history={browserHistory}>

      <Switch>

        <Route exact path="/" component={Login} />

        <Route path="/main" component={App} />

        <Route path="/signup" component={Signup} />

        <Route path="/links" component={InfoContainer} />

        <Route path="*" component={NotFound} />

      </Switch>

    </Router>

  </Provider>

);


Meteor.startup(() => {

  render(Root, document.getElementById('react-target'));

});


links는 인증된 사용자만 볼 수 있으므로 Tracker.autorun이라는 Reactivity Computation 영역에서 Meteor.user()라는 Reactivity Source가 로그인 상태인지 검사한다. 

  - 로그인 상태가 아니면 무조건 login화면으로 이동

  - 로그인 상태이면서 인증이 필요없는 화면인 경우 link화면으로 이동

// client/main.tsx 

import { Tracker } from 'meteor/tracker';


Tracker.autorun(() => {

  const isAuthenticated = !!Meteor.user();

  if (isAuthenticated) {

    const pathname = browserHistory.location.pathname;

    const unauthenticatedPages: any = ['/', '/signup'];

    const isUnauthenticatedPage = unauthenticatedPages.includes(pathname);

    if (isUnauthenticatedPage) {

      browserHistory.push('/links'); // main

    } else {

      browserHistory.push(pathname);

    }

  } else {

    browserHistory.push('/'); // login

  }

});


Meteor.startup(() => {

  render(Root, document.getElementById('react-target'));

});


imports/ui/Info.tsx 에 logout 기능 추가

...

import { Accounts } from 'meteor/accounts-base';


interface InfoProps {

  links: any;

  loading: boolean

}


class Info extends React.Component<InfoProps, any> {


  linkList() {

    const { links, loading } = this.props;

    if (loading) {

      return <div>loading...</div>

    } else {

      return <LinkList links={links} />

    }

  }


  onLogout = () => {

    Accounts.logout();

  }


  render() {

    return (

      <div>

        <button onClick={this.onLogout}>Log out</button>

        <AddLink />

        {this.linkList()}

      </div>

    );

  }

}


가입 및 로그인 테스트 확인하기


가입을 하고, 로그인을 한다. 

Chrome Extension 으로 MiniMongoExplorer를 설치하고 user Collection의 내용을 확인한다. 


또는 Chrome DevTool의 Application에서 로그인 사용자의 userId와 console에서 확인해 볼 수 있다. 또한 Link페이지에서 로그아웃을 해보고 콘솔을 확인해 본다. 


<참조>

- 크롬 확장툴 MiniMongoExplorer

- 세번째 글 소스

posted by 윤영식
prev 1 next