Webpack v5.* 기반의 Module Federation 개념을 간단히 정리하고, 환경을 설정해 본다.
Module Federation Concept
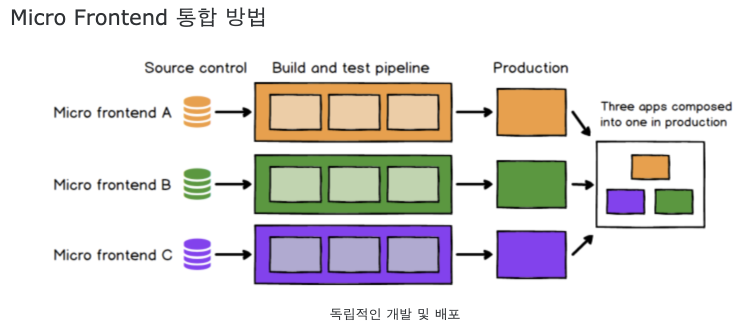
Micro Frontend를 위한 컨셉에서 출발
- 참조: https://mobicon.tistory.com/572
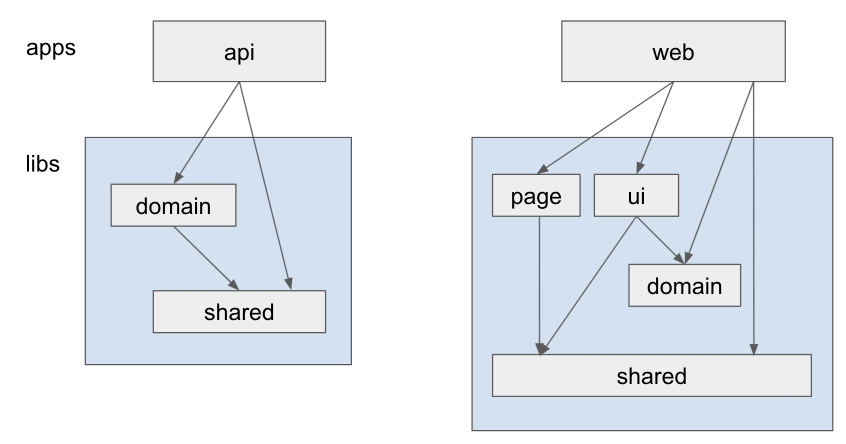
Host 모듈 & Remote 모듈
- 모듈: webpack 번들링으로 생성된 js, css, html 파일 묶음
- Host 모듈: 단일 webpack 모듈 -> 개별 번들링된다.
- Remote 모듈: 단일 webpack 모듈 -> 개별 번들링된다.
+ 빌드시 호스트/원격 모듈 따로 따로 빌드 관리된다. 원격 모듈은 다른 도메인에서 제공할 수도 있다.
- 컨테이너: 각각 따로 빌드되며 독립적인 애플리케이션이다.
+ A, B 컨테이너가 존재하면 각자 상호 로딩가능한다.
- Expose: 컨테이너가 로딩할 원격 모듈 설정
+ 자세한 예: 참조
+ expose 되는 것은 별도의 chunk file 이 생성된다. (즉 해당 chunk file만 로딩해서 사용함)
// Remote App의 webpack.config.js 에서 exposes하기 (App2)
  plugins: [
    // To learn more about the usage of this plugin, please visit https://webpack.js.org/plugins/module-federation-plugin/
    new ModuleFederationPlugin({
      name: 'app2',
      filename: 'remoteEntry.js',
      exposes: {
        './App': './src/App',
      },
      shared: { react: { singleton: true }, 'react-dom': { singleton: true } },
    }),
    new HtmlWebpackPlugin({
      template: './public/index.html',
    }),
  ],

// Host App의 webpack.config.js에서 remote app 로딩하기 (App1)
  plugins: [
    new ModuleFederationPlugin({
      name: "app1",
      remotes: {
        app2: "app2@[app2Url]/remoteEntry.js",
      },
      shared: {react: {singleton: true}, "react-dom": {singleton: true}},
    }),
    new ExternalTemplateRemotesPlugin(),
    new HtmlWebpackPlugin({
      template: "./public/index.html",
    }),
  ],

// App1에서 index.js 에서 app2Url 설정으로 remote app url 설정
// You can write your own logic here to determine the actual url
window.app2Url = "http://localhost:3002"

// Host App에서 app2의 App 비동기 로딩 (App1)
import React, {Suspense} from "react";
const RemoteApp = React.lazy(() => import("app2/App"));

const App = () => {
  return (
    <div>
      <div style={{
        margin:"10px",
        padding:"10px",
        textAlign:"center",
        backgroundColor:"greenyellow"
      }}>
        <h1>App1</h1>
      </div>
      <Suspense fallback={"loading..."}>
        <RemoteApp/>
      </Suspense>
    </div>)
}


export default App;
- 공유 모듈: 여러 컨테이너에서 같이 사용하는 모듈
+ 예: react, react-dom
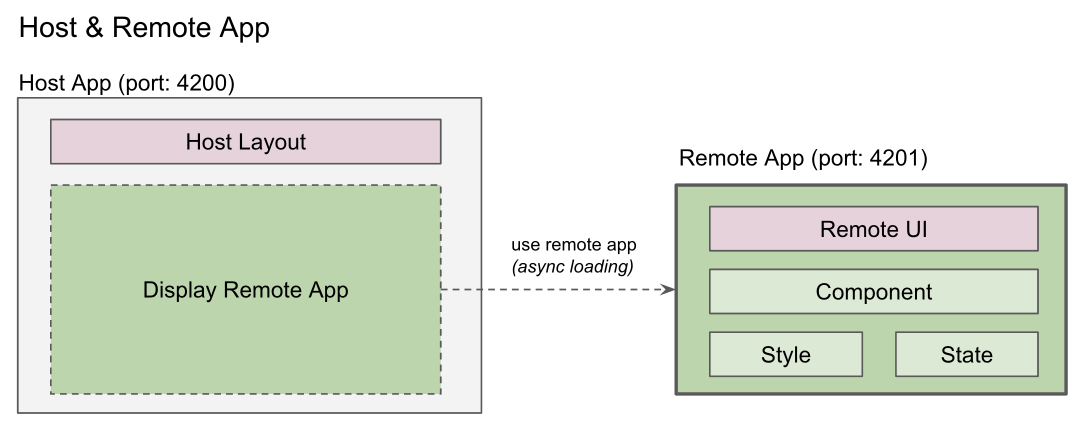
- 호스트 앱: 원격 모듈을 사용하는 컨테이너
+ 리모트 앱이 expose한 원격 모듈을 호스트 앱에서 비동기 로딩해서 사용한다.
- 리모트 앱: 모듈을 expose하는 컨테이너
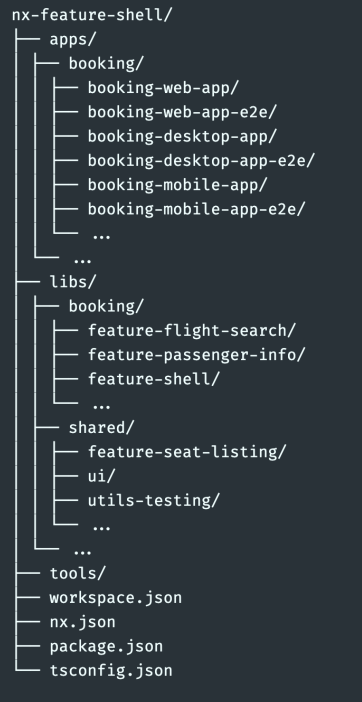
NX 기반 환경설정
NX는 module federation 설정의 Host & Remote App을 생성하고 환경설정에 대해 이해한다. (참조)
Portal App & Micro Apps 역할
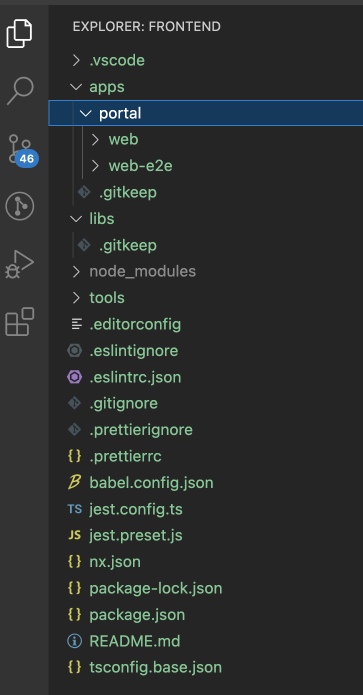
- Portal App
+ Remote 앱이 되어서 다양한 packages의 모듈을 expose 한다.
- Micro App
+ Host 앱이 되어서 portal의 exposed module을 async loading하여 사용한다.

Portal App 모듈과 Micro App 모듈의 분리
- Micro App은 필요한 모듈을 Portal App (remote app) 으로 부터 로딩하여 사용한다. 따라서 Micro App에서 필요한 모듈을 package.json에 설정하여 npm install 하여 로컬에 설치 후 사용하는 것이 아니라, runtime에 로딩하여 사용할 수 있다.
- Micro App 개발시 참조하는 모듈을 로컬에 설치할 필요없이 개발을 진행할 수 있다.
- 즉, Micro Frontend의 개념을 적용하여 개발을 진행한다.
명령어 예
- host라는 host app이 자동 생성된다
- store 이라는 remote app이 자동 생성된다.
- @nx/react:host 의 명령어에 따라서 module federation 관련한 설정 내역이 자동으로 생성된다.
nx g @nx/react:host mf/host --remotes=mf/store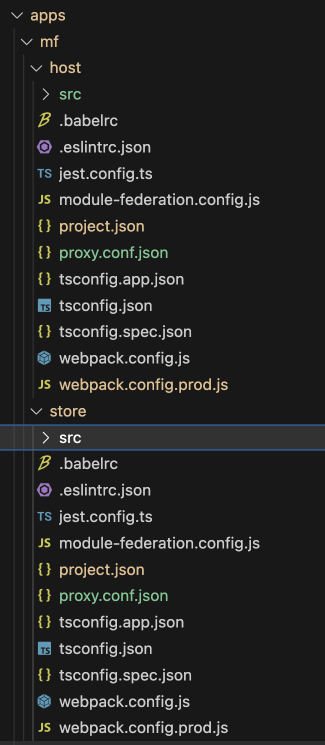
- host app 생성파일들
+ main.ts 에서 bootstrap.tsx를 import 형식: project.json에서 main도 main.ts 로 설정됨 (기존은 main.tsx 하나만 존재)
+ module-federation.config.js 파일 생성: remote 설정
+ webpack.config.<prod>.js 파일들 생성
+ project.json: serve 의 executor가 @nx/react:module-federation-dev-server 로 변경됨
또는 remote app만들 별도로 생성할 수 있다.
npx nx g @nx/react:remote portal/store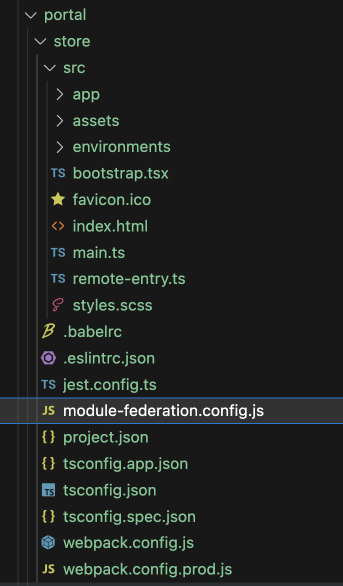
- remote app 생성파일들
+ remote-entry.ts
+ main.ts 에서 bootstrap.tsx를 import 형식: project.json에서 main도 main.ts 로 설정됨 (기존은 main.tsx 하나만 존재)
+ module-federation.config.js 파일 생성: exposes 설정
+ webpack.config.<prod>.js 파일들 생성
+ project.json: serve 의 executor가 @nx/react:module-federation-dev-server 로 변경됨
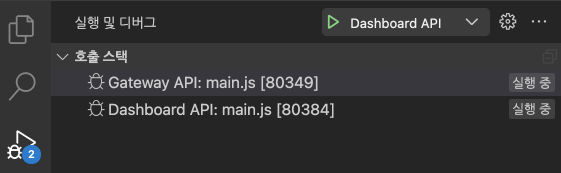
host를 실행하면
+ 관련된 remote도 자동으로 실행된다. (remote는 project.json의 static-server의 port로 자동 실행된다.)
+ 즉, host app과 remote app이 동시에 구동된다.
nx serve mf-host --open
NX 기반 설정파일 이해하기
remote app 설정 파일들
- webpack.config.js
+ withModuleFederation은 node_modules/@nx/react/src/module-federation/with-module-federation.js 위치하고 있고, remote와 shared할 libraries를 자동으로 설정해 준다. 즉, remote빌드시 shared libraries는 external libs로 취급되어 번들파일에 포함되지 않는다.
+ nx 명령을 통해 생성한 remote app에는 webpack.config.js와 webpack.config.prod.js 파일이 자동 생성 및 설정되어 있다.
const { composePlugins, withNx } = require('@nx/webpack');
const { withReact } = require('@nx/react');
const { withModuleFederation } = require('@nx/react/module-federation');

const baseConfig = require('./module-federation.config');

const config = {
  ...baseConfig,
};

// Nx plugins for webpack to build config object from Nx options and context.
module.exports = composePlugins(withNx(), withReact(), withModuleFederation(config));
- module-federation.config.js 파일명은 변경하지 말고 그대로 사용해한다.
+ shared쪽에 libraryName을 체크하여 singleton, strictVersion, requiredVersion을 설정할 수 있다. (host도 동일)
> return undefined 이면 nx default 값 사용
> return false 이면 shared library로 사용하지 않겠다는 의미이다.
> version을 명시하는 경우는 host와 remote간에 버전이 서로 틀릴 경우 사용한다.
module.exports = {
  name: 'mf-store',
  exposes: {
    './Module': './src/remote-entry.ts',
  },
  shared: (libraryName, config) => {
    if (libraryName && libraryName.indexOf('@gv') >= 0) {
      config = { singleton: true, strictVersion: true, requiredVersion: '1.0.0' };
    }
    console.log('--- remote libraryName:', libraryName, config);
    return config;
  },
};
- project.json
+ serve의 executor가 webpack-dev-server가 이니라, module-federation-dev-server 이다. 이는 host 기동시 remote도 자동 기동해 준다.
 "serve": {
      "executor": "@nx/react:module-federation-dev-server",
      "defaultConfiguration": "development",
      "options": {
        "buildTarget": "mf-store:build",
        "hmr": true,
        "proxyConfig": "apps/mf/store/proxy.conf.json",
        "port": 3001
      },
      "configurations": {
        "development": {
          "buildTarget": "mf-store:build:development"
        },
        "production": {
          "buildTarget": "mf-store:build:production",
          "hmr": false
        }
      }
    },
- remote-entry.ts 파일
+ host에 접근할 micro-frontend 애플리케이션
export { default } from './app/dashboard-app';
host app 설정 파일들
- webpack.config.js 개발시 내역은 remote app설정과 동일하다.
- webpack.config.prod.js 에는 remote app의 url path 가 설정된다.
// host의 webpack.config.prod.js 내역

const { composePlugins, withNx } = require('@nx/webpack');
const { withReact } = require('@nx/react');
const { withModuleFederation } = require('@nx/react/module-federation');

const baseConfig = require('./module-federation.config');

const prodConfig = {
  ...baseConfig,
  /*
   * Remote overrides for production.
   * Each entry is a pair of a unique name and the URL where it is deployed.
   *
   * e.g.
   * remotes: [
   *   ['app1', 'http://app1.example.com'],
   *   ['app2', 'http://app2.example.com'],
   * ]
   *
   * You can also use a full path to the remoteEntry.js file if desired.
   *
   * remotes: [
   *   ['app1', 'http://example.com/path/to/app1/remoteEntry.js'],
   *   ['app2', 'http://example.com/path/to/app2/remoteEntry.js'],
   * ]
   */
  remotes: [['mf-store', 'http://localhost:3001/']],
};

// Nx plugins for webpack to build config object from Nx options and context.
module.exports = composePlugins(withNx(), withReact(), withModuleFederation(prodConfig), (config) => {
  // Update the webpack config as needed here.
  // e.g. `config.plugins.push(new MyPlugin())`

  // .tsx 에서  import 구문 ordering 경고 문구 발생 해결하기
  // https://github.com/facebook/create-react-app/issues/5372
  const instanceOfMiniCssExtractPlugin = config.plugins.find(
    (plugin) => plugin.constructor.name === 'MiniCssExtractPlugin'
  );

  if (instanceOfMiniCssExtractPlugin) {
    instanceOfMiniCssExtractPlugin.options.ignoreOrder = true;
  }

  return config;
});
- module-federation.config.js host 자신 app의 명칭과 remote app 의 명칭을 설정한다.
module.exports = {
  name: 'mf-host',
  remotes: ['mf-store'],
  shared: (libraryName, config) => {
    // ref: https://www.angulararchitects.io/en/aktuelles/the-microfrontend-revolution-part-2-module-federation-with-angular/
    if (libraryName && libraryName.indexOf('@gv') >= 0) {
      config = { singleton: true, strictVersion: true, requiredVersion: '1.0.0' };
    }
    console.log('--- host libraryName:', libraryName, config);
    return config;
  },
};
+ node_modules/@nx/react/src/module-federation/with-module-federation.js 소스 내역
> NX에서 host의 sharedLibraries 에 대해 자동으로 목록을 만들어 준다.
"use strict";
Object.defineProperty(exports, "__esModule", { value: true });
exports.withModuleFederation = void 0;
const tslib_1 = require("tslib");
const utils_1 = require("./utils");
const ModuleFederationPlugin = require("webpack/lib/container/ModuleFederationPlugin");
/**
 * @param {ModuleFederationConfig} options
 * @return {Promise<AsyncNxWebpackPlugin>}
 */
function withModuleFederation(options) {
    return tslib_1.__awaiter(this, void 0, void 0, function* () {
        const { sharedDependencies, sharedLibraries, mappedRemotes } = yield (0, utils_1.getModuleFederationConfig)(options);
        return (config, ctx) => {
            var _a;
            config.output.uniqueName = options.name;
            config.output.publicPath = 'auto';
            config.optimization = {
                runtimeChunk: false,
            };
            config.experiments = Object.assign(Object.assign({}, config.experiments), { outputModule: true });
            config.plugins.push(new ModuleFederationPlugin({
                name: options.name,
                library: (_a = options.library) !== null && _a !== void 0 ? _a : { type: 'module' },
                filename: 'remoteEntry.js',
                exposes: options.exposes,
                remotes: mappedRemotes,
                shared: Object.assign({}, sharedDependencies),
            }), sharedLibraries.getReplacementPlugin());
            return config;
        };
    });
}
exports.withModuleFederation = withModuleFederation;
//# sourceMappingURL=with-module-federation.js.map
- remotes.d.ts 는 ts에서 remote app의 모듈을 import 하기위한 definition 파일이다.
// Declare your remote Modules here
// Example declare module 'about/Module';
declare module 'mf-store/Module';
- project.json 에 implicitDependencies 설정하면 mf-host와 mf-store는 하나의 애플리케이션으로 간주된다. (참조)
{
  "name": "mf-host",
  "$schema": "../../../node_modules/nx/schemas/project-schema.json",
  "sourceRoot": "apps/mf/host/src",
  "projectType": "application",
  "implicitDependencies": ["mf-store"],
<참조>
https://fe-developers.kakaoent.com/2022/220623-webpack-module-federation/
Webpack Module Federation 도입 전에 알아야 할 것들 | 카카오엔터테인먼트 FE 기술블로그
유동식(rich) 실용성 있는 프로그램을 추구합니다. 클래식 기타와 Nutrition 공부를 취미로 삼고 있습니다.
fe-developers.kakaoent.com
Webpack.js Module Federation Example - StackBlitz
Run official live example code for Webpack.js Module Federation, created by Webpack on StackBlitz
stackblitz.com
NX module federation: https://nx.dev/recipes/module-federation
Module Federation and Micro Frontends
How to work with and setup Module Federation with Nx.
nx.dev
The Microfrontend Revolution: Module Federation in Webpack 5 - ANGULARarchitects
Module Federation allows loading separately compiled program parts. This makes it an official solution for implementing microfrontends.
www.angulararchitects.io
'React > Architecture' 카테고리의 다른 글
| [MS-12] NodeJS, React, AntD, Nx v16 업데이트 하기 (0) | 2023.05.03 |
|---|---|
| [MS-11] i18n 외부파일 위치 변경 및 Web Dev Server 연결 (0) | 2021.10.07 |
| [MS-10] API/Web i18n 적용 및 리팩토링 (0) | 2021.10.02 |
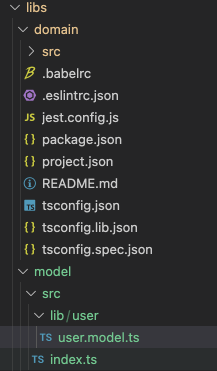
| [MS-9] Login 화면 개발 (0) | 2021.09.30 |
| [MS-8] NestJS Auth/Role 기능 Gateway에 추가하기 (0) | 2021.09.30 |