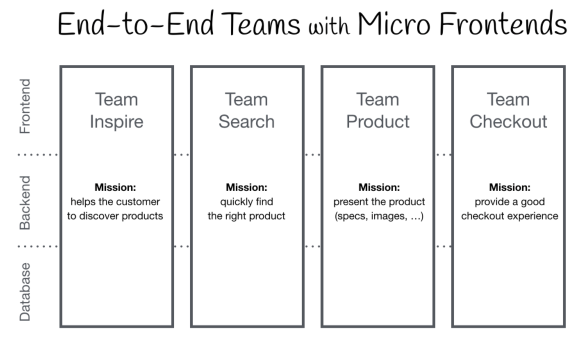
Micro Service들이 멀티 Database를 사용할 경우 또는 Database Schema에 대한 주도권이 없으며 단지 연결하여 사용하는 입장의 Frontend Stack 개발자일 경우 Prisma보다는 TypeORM을 사용하는 것이 좋아보인다.
TypeORM 설치 및 환경설정
nestjs 패키지와 typeorm 그리고 postgresql 패키지를 설치한다.
$> yarn add @nestjs/typeorm typeorm pg.env를 읽는 방식이 아니라 별도의 configuration json 파일에서 환경설정토록 한다.
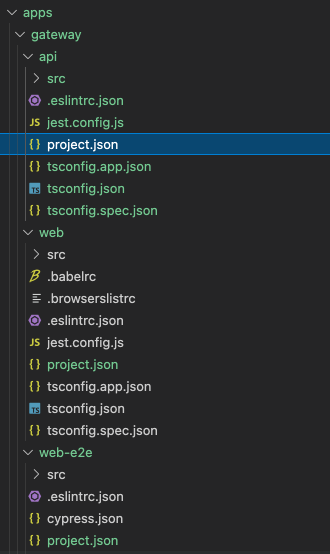
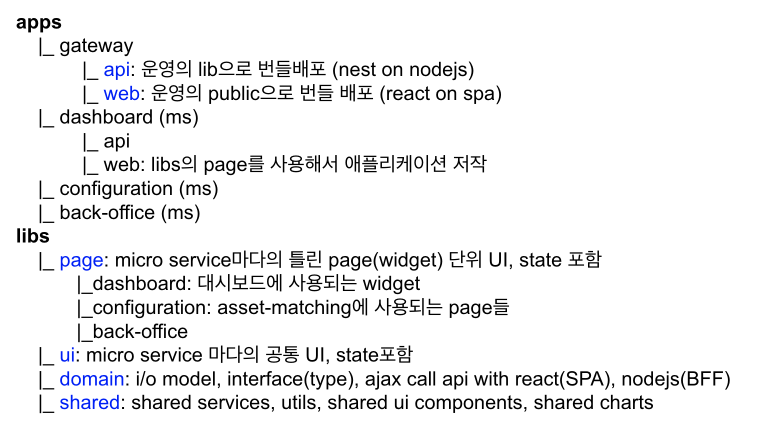
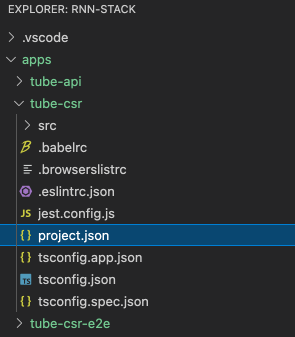
apps/gateway/api/src/environments/ 폴더에 orm-config.json 과 orm-config.prod.json 파일을 생성한다.
- synchronized는 반드시 개발시에만 true로 사용한다.
// orm-config.json
{
"HOST": "localhost",
"PORT": 5432,
"USER": "iot",
"PASSWORD": "1",
"DATABASE": "rnm-stack",
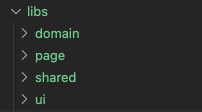
"ENTITIES": ["libs/domain/src/lib/entities/**/*.entity.ts"],
"MODE": "dev",
"SYNC": true
}
// Production 환경에서 사용
// orm-config.prod.json
{
"HOST": "localhost",
"PORT": 5432,
"USER": "iot",
"PASSWORD": "1",
"DATABASE": "rnm-stack",
"ENTITIES": ["libs/domain/src/lib/entities/**/*.entity.ts"],
"MODE": "production",
"SYNC": false
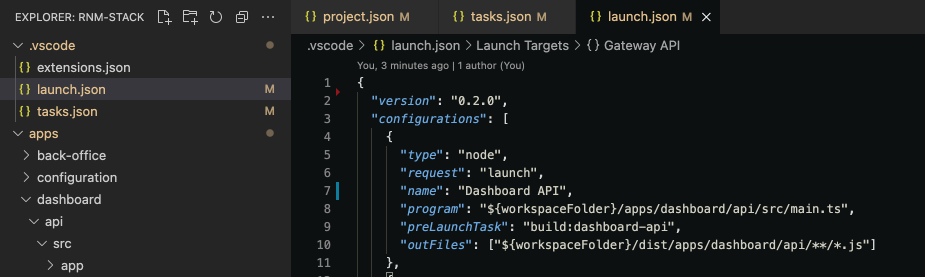
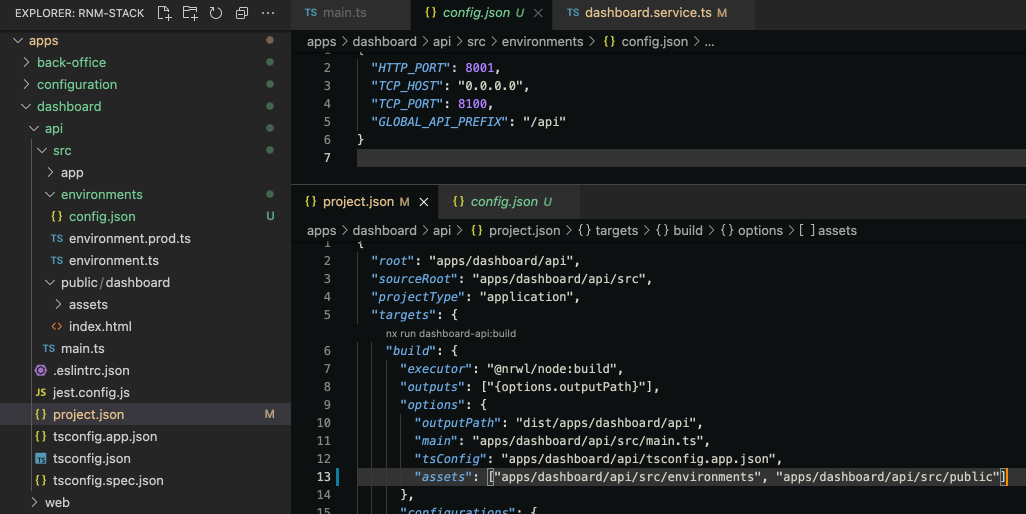
}dev와 prod간의 config 스위칭을 위하여 apps/gateway/api/project.json 안에 replacement 문구를 추가한다.
// project.json 일부내역
"fileReplacements": [
{
  "replace": "apps/gateway/api/src/environments/environment.ts",
  "with": "apps/gateway/api/src/environments/environment.prod.ts"
},
{
  "replace": "apps/gateway/api/src/environments/config.ts",
  "with": "apps/gateway/api/src/environments/config.prod.ts"
},
{
  "replace": "apps/gateway/api/src/environments/orm-config.ts",
  "with": "apps/gateway/api/src/environments/orm-config.prod.ts"
}
]
libs/shared/src/lib/configuration/ 폴더에 orm-config.service.ts 파일을 생성하고, orm-config.json 파일을 값을 다루도록 한다.
// orm-config.service.ts
import { TypeOrmModuleOptions } from '@nestjs/typeorm';
import { loadOrmConfiguration } from './config.service';

class OrmConfigService {
  constructor(private env: { [k: string]: any }) { }

  ensureValues(keys: string[]) {
    keys.forEach(k => this.getValue(k, true));
    return this;
  }

  getPort() {
    return this.getValue('PORT', true);
  }

  isProduction() {
    const mode = this.getValue('MODE', false);
    return mode !== 'dev';
  }

  getTypeOrmConfig(): TypeOrmModuleOptions {
    const config: TypeOrmModuleOptions = {
      type: 'postgres',
      host: this.getValue('HOST'),
      port: parseInt(this.getValue('PORT')),
      username: this.getValue('USER'),
      password: this.getValue('PASSWORD'),
      database: this.getValue('DATABASE'),
      entities: this.getValue('ENTITIES'),
      synchronize: this.getValue('SYNC'),
    };
    return config;
  }

  private getValue(key: string, throwOnMissing = true): any {
    const value = this.env[key];
    if (!value && throwOnMissing) {
      throw new Error(`config error - missing orm-config.${key}`);
    }
    return value;
  }

}

/**
 * Singleton Config
 */
const ormEnv: any = loadOrmConfiguration();
const ormConfigService = new OrmConfigService(ormEnv)
  .ensureValues([
    'HOST',
    'PORT',
    'USER',
    'PASSWORD',
    'DATABASE'
  ]);

export { ormConfigService };
apps/gateway/api/src/app/app.module.ts 에서 해당 configuration을 설정토록한다. @nestjs/typeorm의 모듈을 사용한다.
// app.module.ts
import { join } from 'path';
import { Module } from '@nestjs/common';
import { ServeStaticModule } from '@nestjs/serve-static';
import { TypeOrmModule } from '@nestjs/typeorm';
import { getMetadataArgsStorage } from 'typeorm';

import { GatewayApiAppService, EntitiesModule } from '@rnm/domain';
import { ormConfigService } from '@rnm/shared';

import { DashboardModule } from './dashboard/microservice/dashboard.module';
import { AppController } from './app.controller';
import { UserController } from './user/user.controller';

@Module({
  imports: [
    ServeStaticModule.forRoot({
      rootPath: join(__dirname, 'public'),
      exclude: [
        '/api/gateway*', '/api/dashboard*', '/api/configuration*', '/api/back-office*',
        '/dashboard*', '/configuration*', '/back-office*'
      ],
    }),
    // ORM 환경을 설정한다. orm-config.json에 설정했던 entities의 내용을 등록한다.
    TypeOrmModule.forRoot({
      ...ormConfigService.getTypeOrmConfig(),
      entities: getMetadataArgsStorage().tables.map(tbl => tbl.target)
    }),
    EntitiesModule,
    // MicroService
    DashboardModule,
  ],
  controllers: [
    AppController,
    UserController
  ],
  providers: [GatewayApiAppService]
})
export class AppModule { }
TypeORM사용 패턴
typeorm은 두가지 패턴을 선택적으로 사용할 수 있다.
- Active Record: BeanEntity를 상속받아 entity내에서 CRUD 하기. (작은 서비스유리)
- Data Mapper: Model은 별도이고, Respository가 DB와 연결하고, CRUD를 별도 서비스로 만든다. (큰 서비스유리)
Data Mapper 패턴을 사용하기 위해 libs/domain/src/lib/entities/user/ 폴더하위에 user.entity.ts, user.model, user.service.ts 파일을 생성한다.
- user.entity.ts: table schema
- user.model.ts: interface DTO
- user.service.ts: CRUD
// user.entity.ts
import { Entity, Column, PrimaryGeneratedColumn } from 'typeorm';

@Entity('user_iot')
export class UserEntity {
  @PrimaryGeneratedColumn()
  id!: number;

  @Column()
  username!: string;

  @Column()
  password!: string;

  @Column()
  email!: string;

  @Column()
  firstName!: string;

  @Column()
  lastName!: string;

  @Column({ default: false })
  isActive!: boolean;

  // USER, ADMIN, SUPER
  @Column({ default: 'USER' })
  role!: string;
}


// user.model.ts
export interface User {
  id: number;
  username: string;
  password: string;
  email?: string;
  firstName: string;
  lastName: string;
  isActive: boolean;
  role: string;
}


// user.service.ts
import { Injectable } from '@nestjs/common';
import { InjectRepository } from '@nestjs/typeorm';
import { Repository } from 'typeorm';

import { UserEntity } from './user.entity';
import { User } from './user.model';

@Injectable()
export class UserService {
  constructor(
    @InjectRepository(UserEntity) private repository: Repository<UserEntity>
  ) { }

  create(data: User): Promise<User> {
    return this.repository.save(data);
  }

  updateOne(id: number, data: User): Promise<any> {
    return this.repository.update(id, data);
  }

  findAll(): Promise<User[]> {
    return this.repository.find();
  }

  findOne(username: string): Promise<User | undefined> {
    // findOne이 객체라는 것에 주의
    return this.repository.findOne({ username });
  }

  deleteOne(id: string): Promise<any> {
    return this.repository.delete(id);
  }
}
libs/domain/src/lib/entities/ 폴더에 entity.module.ts 생성하고, user.entity.ts를 등록한다. entity.module.ts에는 user.entity외에 계속 추가되는 entity들을 forFeature로 등록한다.
// entity.module.ts
import { Module } from '@nestjs/common';
import { TypeOrmModule } from '@nestjs/typeorm';
import { UserService } from './user/user.service';
import { UserEntity } from './user/user.entity';

@Module({
  imports: [
    TypeOrmModule.forFeature([UserEntity])
  ],
  providers: [UserService],
  exports: [UserService]
})
export class EntitiesModule { }
entity.module.ts을 사용하기 위해 apps/gateway/api/src/app/app.module.ts 파일에 등록한다.
//app.module.ts
import { TypeOrmModule } from '@nestjs/typeorm';
import { EntitiesModule } from '@rnm/domain';
import { ormConfigService } from '@rnm/shared';

@Module({
  imports: [
    ...
    // ORM
    TypeOrmModule.forRoot(ormConfigService.getTypeOrmConfig()),
    EntitiesModule,
    ...
  ],
  ...
})
export class AppModule { }
User CRUD 컨트롤러 작성 및 테스트
사용자 CRUD를 위한 controller를 작성한다. apps/gateway/api/src/app/user/ 폴더를 생성하고, user.controller.ts 파일을 생성한다.
// user.controller.ts
import { Body, Controller, Delete, Get, Param, Post, Put } from '@nestjs/common';
import { User, UserService } from '@rnm/domain';
@Controller('api/gateway/user')
export class UserController {
constructor(
private readonly service: UserService
) { }
@Post()
create(@Body() data: User): Promise<User> {
return this.service.create(data);
}
@Put(':id')
updateOne(@Param('id') id: number, @Body() data: User): Promise<any> {
return this.service.updateOne(id, data);
}
@Get()
findAll(): Promise<User[]> {
return this.service.findAll();
}
@Get(':username')
findOne(@Param('username') username: string): Promise<User | undefined> {
return this.service.findOne(username);
}
@Delete(':id')
deleteOne(@Param('id') id: string): Promise<any> {
return this.service.deleteOne(id);
}
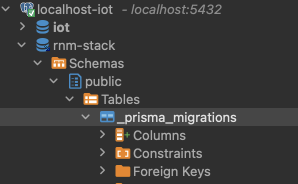
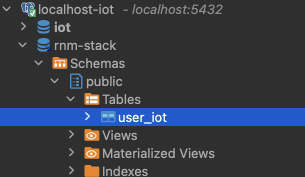
}gateway를 start하면 dev모드에서 synchronized: true에서 "user_iot" 테이블이 자동으로 생성한다.
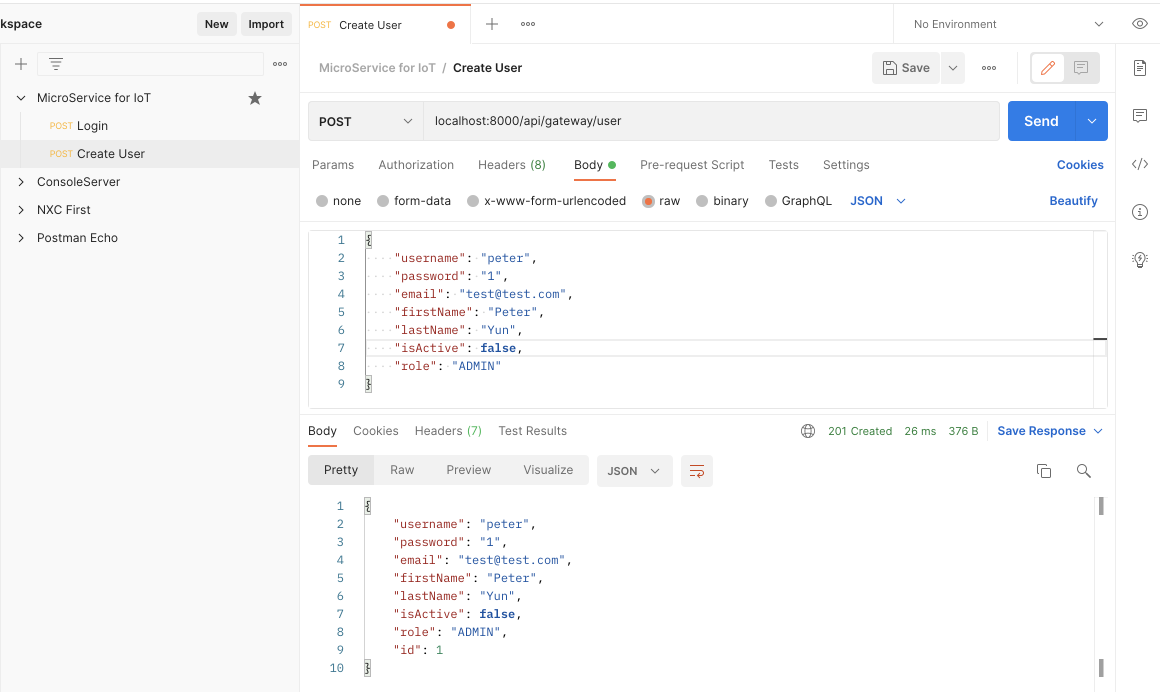
Postman으로 호출을 해본다.
- POST method 선택
- Body에 request json 입력
- JSON 형식 선택
- "Send" 클릭
<참조>
- TypeORM 사용형태
TypeORM 개념 및 설치 및 사용방법
👉 Typeorm 공식문서 ORM 개요 Object-relational mapping, 객체-관계 매핑 객체와 관계형 데이터베이스의 데이터를 자동으로 매핑(연결)해준다. 객체 지향 프로그래밍은 클래스를 사용하고, 관계형 데이
aonee.tistory.com
- TypeORM & Observable 로 변경 사용하는 방법
https://www.youtube.com/watch?v=Z6kw_aJHJLU
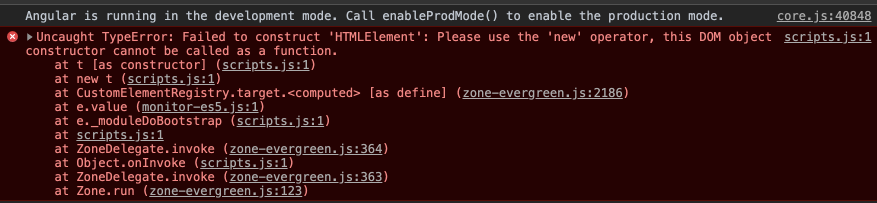
- Nx에서 typeorm 로딩시 에러 이슈
https://github.com/nrwl/nx/issues/1393
tsconfig target incompatibility with NestJS and TypeORM module · Issue #1393 · nrwl/nx
Prerequisites I am running the latest version I checked the documentation and found no answer I checked to make sure that this issue has not already been filed I'm reporting the issue to the co...
github.com
'[App FullStacker] > Architecture' 카테고리의 다른 글
| [MS-7] Refresh Token 설정 (0) | 2021.09.30 |
|---|---|
| [MS-6] NestJS의 JWT 기반 Auth Server 환경구축 (0) | 2021.09.27 |
| [MS-4] Gateway에 Prisma ORM 사용하기 (0) | 2021.09.24 |
| [MS-3] Gateway와 Micro Service간 디버깅 환경 구축 (0) | 2021.09.23 |
| [MS-2] React & Nest 기반 애플리케이션 및 Micro Service 통신 설정 (0) | 2021.09.20 |